Check Your Engine Oil: Easy Steps for Optimal Car Health
Last Updated on September 1, 2026 by Ryan
Regularly checking your engine oil is vital for maintaining car health and preventing costly damage. This guide provides a clear, step-by-step process to accurately measure your oil level and assess its condition. Learn how to ensure your engine runs smoothly and efficiently.
🎯 Key Takeaways

- Always check oil on level ground when engine is cool.
- Use a clean cloth to wipe the dipstick thoroughly.
- Ensure oil level falls between MIN and MAX marks.
- Note oil color and consistency for early issues.
- Consult owner’s manual for correct oil type if adding.
Checking your engine oil is a straightforward task that provides crucial insights into your car’s health. You don’t need a mechanic or special tools; just a few minutes of your time. Regularly monitoring your oil level and condition can prevent costly engine damage, ensure peak performance, and extend the life of your vehicle. It’s a simple, proactive habit that pays significant dividends.

This essential maintenance check helps you understand when your engine might be consuming oil, if there’s a potential leak, or if the oil itself is degrading and needs changing. Knowing how to accurately perform this check empowers you to make informed decisions about your car’s upkeep, catching minor issues before they become major problems. Let’s walk through the precise steps to get it right every time.
Understanding Engine Oil’s Role and Importance


Engine oil acts as your car’s lifeblood, performing several critical functions. It lubricates moving parts, reducing friction and wear, which prevents overheating and premature engine failure. Oil also helps to clean the engine by carrying away dirt and contaminants, and it assists in sealing the pistons. Without sufficient, clean oil, your engine is at risk of severe damage.
Why Engine Oil is Your Car’s Lifeblood
Your engine contains dozens of metal components constantly moving against each other at high speeds. Engine oil creates a thin protective film between these parts. This film prevents direct metal-on-metal contact, which would otherwise generate immense heat and cause components to weld together or rapidly wear out. Think of it as a constant, internal cooling and cleaning system.
Quick Checks for Proactive Maintenance
Regular oil checks are a key part of proactive vehicle maintenance. They are quick, free, and give you immediate feedback. You can often spot issues like low oil levels or contaminated oil long before a warning light appears on your dashboard. This vigilance saves you from potential breakdowns and expensive repairs down the road.
How to Check Your Engine Oil Like a Pro: A Practical Walkthrough


This comprehensive guide will walk you through the essential process of checking your vehicle’s engine oil, a critical aspect of routine maintenance. Ensuring your engine has the correct oil level is vital for its longevity, performance, and to prevent costly damage. By following these detailed steps, you’ll gain confidence in performing this simple yet crucial check, keeping your car running smoothly and efficiently.
Step 1: Park, Power Down, and Patience
What you need: Your vehicle, a level parking spot.
Instructions: Begin by parking your car on a flat, level surface. This is crucial for an accurate reading, as an incline can cause the oil to pool unevenly, leading to a false low or high reading. Turn off the engine completely and engage the parking brake for safety. Allow the engine to cool down for at least 5-10 minutes, ideally 15-20 minutes, especially if you’ve just driven it. This gives the oil sufficient time to drain back into the oil pan from the engine’s various components.
Pro Tip: Checking immediately after driving can result in an artificially low reading because much of the oil is still circulating in the engine. Patience ensures gravity does its job and gives you the most accurate level.
Step 2: Gather Your Essential Toolkit
What you need: Clean shop rags or paper towels, your vehicle’s owner’s manual (optional, but highly recommended).
Instructions: Before you even pop the hood, ensure you have a stack of clean shop rags or sturdy paper towels within reach. You’ll need these to thoroughly wipe the dipstick clean, allowing for an unobstructed and accurate reading. While not strictly necessary for the check itself, having your car’s owner’s manual handy can be incredibly useful. It often specifies the exact type of engine oil recommended for your vehicle (e.g., 5W-30, 0W-20), which is critical if you discover you need to add oil.
Pro Tip: Avoid using linty cloths or tissues, as small fibers can detach and potentially contaminate your oil. Dedicate a specific, clean rag for this task to prevent introducing foreign material into your engine.
Step 3: Locate the Engine Oil Dipstick
What you need: Nothing additional.
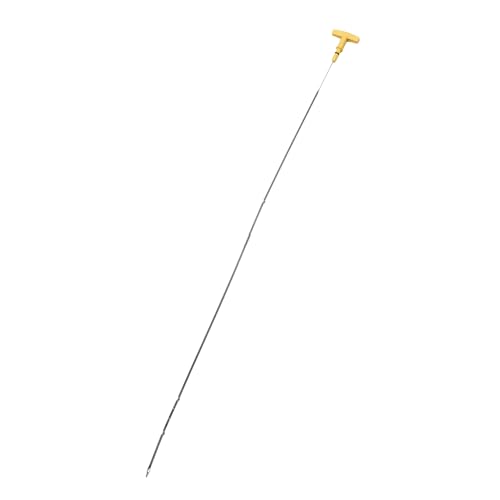
Instructions: Pop your vehicle’s hood and secure it safely in the open position. Now, locate the engine oil dipstick. It’s typically easy to spot, often featuring a brightly colored handle (yellow, orange, or white) for quick identification. It’s usually located on the side or front of the engine block. In some cars, particularly those with cramped engine bays, you might need to lean in slightly to see it. Consult your owner’s manual if you’re having trouble locating it, as exact placement varies by manufacturer and model.
Pro Tip: Don’t confuse the engine oil dipstick with other fluid dipsticks, such as the transmission fluid dipstick (which might be red) or the coolant reservoir cap. The engine oil dipstick almost always has an oil can icon or the words “ENGINE OIL” nearby for clear identification.
Step 4: The Initial Clean Wipe
What you need: Clean shop rags or paper towels.
Instructions: Firmly grasp the dipstick handle and carefully pull it straight out of its tube. This first pull is primarily to remove any old oil that may be clinging to the dipstick from the last engine run. Take one of your clean rags or paper towels and wipe the entire length of the metal dipstick blade absolutely clean. Pay close attention to the measuring marks near the end of the dipstick. You want these marks free of any residual oil to ensure a precise reading in the next step.
Pro Tip: Observe the color and consistency of the oil on the first pull. Very dark, gritty, or sludgy oil indicates it’s time for an oil change, even if the level is correct. Fresh oil is typically clear and amber.
Step 5: The Precise Measurement
What you need: Nothing additional.
Instructions: Once the dipstick is completely clean, re-insert it fully back into its tube until the handle seats properly. Ensure it goes all the way in without snagging. Wait a few seconds (3-5 seconds is usually sufficient) to allow the oil on the dipstick to settle and accurately reflect the oil level in the pan. Now, carefully pull the dipstick out again, keeping it as level as possible to avoid smearing oil up the blade as it exits the tube.
Pro Tip: If the dipstick feels sticky or difficult to re-insert, give it a slight twist as you push it in. Avoid bending or forcing it, as this could damage the dipstick or the tube, potentially leading to inaccurate readings or even leaks.
Step 6: Deciphering the Oil Level
What you need: Nothing additional.
Instructions: Examine the end of the dipstick immediately after removing it. You’ll notice two marks on the dipstick—usually two dots, notches, or an area between “MIN” and “MAX” (or “ADD” and “FULL”). The oil level should ideally fall within this safe operating range, preferably closer to the “MAX” or “FULL” mark. If the oil smear is below the “MIN” or “ADD” mark, your engine is low on oil and requires immediate attention. If it’s significantly above the “MAX” mark, you have too much oil, which can also cause problems.
Pro Tip: A clear, visible line between the two marks indicates a good reading. If the oil is smeared or uneven, indicating an ambiguous reading, repeat Step 5 and 6 until you get a distinct, unambiguous line.
Step 7: Topping Up Your Engine (If Needed)
What you need: Correct type of engine oil (refer to owner’s manual), funnel.
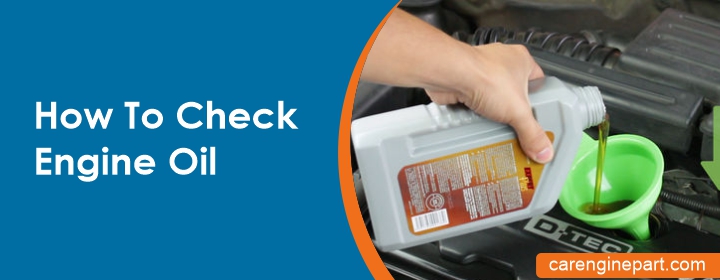
Instructions: If your oil level is below the “MIN” mark, you need to add oil. Remove the oil filler cap (usually marked with an oil can symbol) on top of the engine. Using a clean funnel, carefully pour in small increments of the correct type of engine oil specified in your owner’s manual (e.g., 1/4 to 1/2 quart at a time). Wait a few minutes for the oil to settle, then re-check the dipstick following Steps 4-6. Repeat this process until the oil level is within the safe operating range, ideally at the “FULL” mark.
Pro Tip: Always add oil slowly and in small amounts. It’s much easier to add more oil than to drain excess oil, and overfilling can be as damaging as underfilling. Never mix different types or viscosities of oil unless explicitly stated in your manual, as this can dilute protective additives.
Step 8: Final Checks and Securement
What you need: Nothing additional.
Instructions: Once the oil level is within the safe range, replace the dipstick securely in its tube, ensuring it’s pushed all the way down until the handle seats properly. Also, firmly replace the oil filler cap, twisting it clockwise until it’s snug. A loose oil filler cap can lead to oil leaks and contamination. Do a quick visual check around the engine bay for any spilled oil; clean it up immediately to prevent future issues and reduce fire risk. Finally, close your hood securely, ensuring both latches engage.
Pro Tip: Make a habit of checking your oil at least once a month or before a long road trip. This regular maintenance can alert you to potential problems like leaks or excessive oil consumption early on, saving you from major engine repairs and ensuring peace of mind.
✅ Final Checklist
- Oil level is between the “MIN” and “MAX” marks on the dipstick.
- Dipstick is fully seated in its tube.
- Oil filler cap is securely tightened.
- No spilled oil in the engine bay.
- Hood is securely latched.
Important Notes:
- Safety considerations or warnings: Always ensure the engine is off and cool before checking oil. Keep hands and loose clothing away from moving engine parts, even when cool, as components can still be sharp. Wear gloves if you prefer to avoid getting oil on your hands. Dispose of used oily rags responsibly according to local regulations.
- When to seek professional help: If your oil level consistently drops rapidly between checks, if the oil appears milky (indicating coolant mixing with oil), if you find metallic shavings on the dipstick, or if your “Check Engine Oil” warning light illuminates, consult a professional mechanic immediately. These are signs of potentially serious engine problems that require expert diagnosis.
- Estimated time and cost range: Checking engine oil typically takes 5-15 minutes. If you need to add oil, a quart or liter of conventional engine oil typically costs $5-$10, while synthetic oil can range from $8-$15 per quart/liter, depending on brand and type. The total cost for a top-up is usually minimal.
Optimal Conditions for an Accurate Oil Check
To get the most accurate reading of your engine oil, you need to set the stage correctly. Two primary factors influence the reliability of your dipstick reading: where you park your car and the engine’s temperature. Ignoring these can lead to misinterpretations, potentially causing you to add too much or too little oil.
Parking on Level Ground
Always park your car on a level surface before checking the oil. If your vehicle is tilted, the oil inside the engine pan will pool to one side, preventing the dipstick from giving an accurate measurement. A slight incline can make the oil level appear higher or lower than it actually is, leading to incorrect top-ups. A flat driveway or parking spot is ideal.
Engine Temperature Matters
For most vehicles, the best time to check your oil is when the engine is warm but has been off for several minutes. Here’s why:
- Engine Off: When the engine is running, oil is actively circulating throughout the engine. Turning it off allows all the oil to drain back into the oil pan, where the dipstick measures it.
- Warm Engine: Oil expands slightly when warm. Checking it after it’s been run (but given time to settle) ensures you’re measuring it at a representative operating temperature.
- Wait Time: Aim for 5-10 minutes after turning the engine off. This waiting period is critical for all the oil to settle back down. If you check immediately after turning off a hot engine, the reading will be artificially low. If the engine is completely cold (e.g., first thing in the morning), the reading will be accurate for cold oil, but checking warm oil is often preferred as it reflects the oil’s volume during operation.
The Step-by-Step Process: Checking Your Engine Oil
Now that your car is in optimal position, it’s time to perform the actual check. This process is simple but requires attention to detail. Follow these precise steps for a reliable reading of your engine’s oil level and initial assessment of its condition.
Gather Your Supplies
You only need a couple of basic items to check your engine oil:
- Clean Rag or Paper Towel: Essential for wiping the dipstick.
- Gloves (Optional): To keep your hands clean.
Locate the Dipstick
Open your car’s hood. The engine oil dipstick is typically easy to spot. It usually has a brightly colored handle (often yellow or orange) and is designed to be pulled out by hand. Consult your owner’s manual if you have trouble finding it; its location can vary slightly between vehicle models.
The Initial Wipe and Re-Insertion
- Pull it Out: Firmly grasp the dipstick handle and pull it completely out of its tube.
- Wipe Clean: Use your clean rag or paper towel to thoroughly wipe off all the oil from the dipstick. This first pull will likely show oil smeared up the stick, which isn’t an accurate reading.
- Re-Insert Fully: Push the clean dipstick all the way back into its tube until it’s fully seated. Ensure it goes in completely to get a true reading.
- Wait (Briefly): Pull it out again after a few seconds. This allows the oil to properly mark the stick.
Reading the Oil Level Accurately
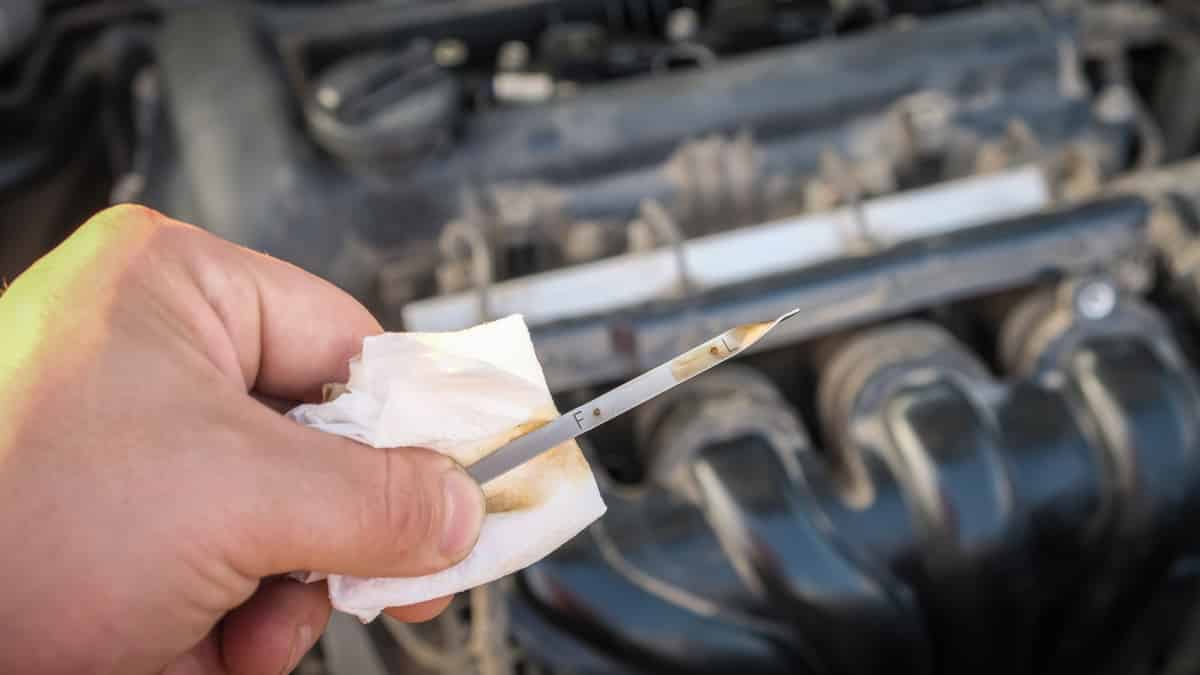
Once you pull the dipstick out for the second time, examine the oil level carefully. Look at the markings near the end of the dipstick. Most dipsticks have two marks, lines, or holes indicating the acceptable operating range. These are often labeled “MIN” and “MAX,” or “ADD” and “FULL.”
- Full/Max Line: This is the upper limit. The oil level should ideally be at or very close to this mark.
- Add/Min Line: This is the lower limit. If your oil level is at or below this mark, it means you need to add oil to your engine.
The space between the MIN and MAX marks usually represents about one quart (or liter) of oil. If your oil level falls anywhere between these two marks, your engine oil level is acceptable. However, aiming for the top of the “safe” range (near the “MAX” mark) is generally recommended for optimal lubrication and cooling, provided you do not overfill.
<h2>Interpreting Dipstick Markings and Oil Condition</h2>
<p>Once you’ve performed the oil check, the real insights come from understanding what your dipstick is telling you. It’s not just about a level; it’s about the quality of the oil itself. Taking a moment to properly interpret these indicators can reveal a lot about your engine’s health.</p>
<h3>Decoding the ‘Full’ and ‘Add’ Marks</h3>
<p>Most dipsticks have two distinct marks: a pair of dots, lines, or a cross-hatched area. The upper mark usually indicates the <strong>FULL</strong> level, while the lower mark signifies the <strong>ADD</strong> or <strong>LOW</strong> level. Ideally, your oil level should fall within this range, preferably closer to the ‘FULL’ mark. If your oil is below the lower mark, it’s definitely time to add more.</p>
<ul>
<li><strong>Between the Marks:</strong> A level anywhere between the two marks is generally acceptable, though being closer to ‘FULL’ is always better for optimal lubrication and cooling.</li>
<li><strong>Below the ‘Add’ Mark:</strong> This is a clear indicator that your engine is low on oil and needs immediate attention. Running an engine with insufficient oil can lead to serious, costly damage.</li>
<li><strong>Above the ‘Full’ Mark:</strong> While less common, an overfilled engine can also cause problems. Excess oil can become aerated, reducing its lubricating properties and potentially damaging seals or the catalytic converter. If you notice this, it’s best to have a mechanic drain the excess.</li>
</ul>
<h3>What Your Oil’s Color and Consistency Tell You</h3>
<p>Beyond the level, observe the oil itself. New engine oil typically has a clear, golden, or amber color. As it circulates through your engine, it picks up combustion byproducts and contaminants, naturally darkening over time. </p>
<ul>
<li><strong>Dark Brown/Black:</strong> For most cars, especially diesels, this is normal for used oil. It simply means the oil is doing its job, cleaning the engine. It doesn’t necessarily indicate a problem, but it might suggest it’s getting close to its change interval.</li>
<li><strong>Milky or Foamy:</strong> This is a significant warning sign. Milky oil, often with a grayish tint, usually indicates that coolant is mixing with your oil, likely due to a head gasket leak. Foamy oil could also suggest moisture contamination.</li>
<li><strong>Gritty or Metallic Specks:</strong> If you feel grit between your fingers or see shiny metallic particles, this points to excessive wear of internal engine components. This is a serious issue that warrants immediate professional inspection.</li>
<li><strong>Very Thick and Sludgy:</strong> Oil that feels excessively thick or looks like sludge often means it’s long overdue for a change, has broken down significantly, or is suffering from extreme contamination. </li>
</ul>
<h2>Frequency of Checks and Next Steps for Low Oil</h2>
<p>Making engine oil checks a regular part of your car maintenance routine is one of the easiest ways to prevent costly repairs. Knowing when to check and what to do if your oil is low are crucial pieces of information for every car owner.</p>
<h3>How Often Should You Check Your Oil?</h3>
<p>There’s no single answer that fits every car, but a general guideline is to check your engine oil <strong>at least once a month</strong>. However, certain factors might necessitate more frequent checks:</p>
<ul>
<li><strong>Older Vehicles:</strong> Older engines tend to consume or leak oil more readily than newer ones.</li>
<li><strong>High Mileage:</strong> Cars that rack up a lot of miles quickly benefit from more frequent checks, especially if you drive long distances regularly.</li>
<li><strong>Heavy Usage:</strong> If you frequently tow heavy loads, drive in extreme temperatures, or face stop-and-go city traffic, your engine works harder, and oil degradation might accelerate.</li>
<li><strong>Before Long Trips:</strong> Always check your oil before embarking on a long road trip. It’s a simple preventive measure that can save you a lot of hassle on the highway.</li>
<li><strong>Known Oil Consumption:</strong> Some engine designs are known to consume oil. If your car is one of these, or if you’ve noticed it tends to run low between oil changes, check more often.</li>
</ul>
<p>Always refer to your car’s owner’s manual for specific recommendations on oil check frequency and oil change intervals. Modern cars often have warning lights for low oil pressure, but checking manually is always best.</p>
<h3>What to Do When Your Oil is Low</h3>
<p>Discovering your oil is low isn’t a cause for panic, but it does require prompt action. Topping up your oil is usually a straightforward process, but it’s important to do it correctly:</p>
<ul>
<li><strong>Consult Your Owner’s Manual:</strong> This is your go-to guide for the correct type, viscosity (e.g., 5W-30), and specification of engine oil your car requires. Using the wrong oil can do more harm than good.</li>
<li><strong>Add Slowly:</strong> Add oil in small increments, typically about a quarter to half a quart at a time. After adding, wait a few minutes for the oil to settle, then recheck the dipstick. Repeat until the oil level is within the acceptable range, ideally near the ‘FULL’ mark.</li>
<li><strong>Avoid Overfilling:</strong> As mentioned, overfilling can be detrimental. It’s better to be slightly underfilled than significantly overfilled.</li>
<li><strong>Monitor for Leaks:</strong> If your oil level consistently drops quickly, check for oil leaks under your car or unusual smoke from the exhaust. Persistent low oil could indicate a more serious underlying issue that requires professional attention.</li>
<li><strong>Professional Help:</strong> If you’re unsure about the oil type, how much to add, or if you suspect a leak or other problem, don’t hesitate to visit a trusted mechanic. They can diagnose and rectify any issues.</li>
</ul>
<h2>Conclusion</h2>
<p>Checking your engine oil is a small task with a huge impact on your car’s longevity and performance. It’s more than just a quick glance; it’s an essential diagnostic step that empowers you to catch potential issues early. By understanding your dipstick’s markings, recognizing the signs of healthy (or unhealthy) oil, and knowing when and how to top up, you’re actively contributing to your engine’s well-being.</p>
<p>Make it a habit to check your oil monthly, always keep your owner’s manual handy for oil specifications, and don’t shy away from professional help if you’re ever in doubt. A little vigilance now can save you from major headaches and expenses down the road. Keep your engine lubricated, and it will keep you moving forward!</p>
❓ Frequently Asked Questions
Why is checking engine oil so important for my car’s longevity?
Regularly checking engine oil is critical because oil lubricates moving parts, reduces friction, cools the engine, and cleans impurities. Proper oil levels prevent premature wear, overheating, and potentially catastrophic engine damage, extending your vehicle’s lifespan and maintaining performance.
What are the ideal conditions for an accurate engine oil reading?
For the most accurate reading, park your car on a level surface and ensure the engine has reached operating temperature, then turn it off and wait 5-10 minutes for the oil to drain back into the oil pan. This allows for a stable and true measurement on the dipstick.
Besides the level, what else should I look for when checking my engine oil?
Beyond the level, inspect the oil’s color, consistency, and smell. Healthy oil is typically amber or light brown; very dark or milky oil can indicate problems like contamination or coolant leaks, while a burnt smell might suggest overheating or an overdue change.
What should I do if my engine oil is consistently low between oil changes?
If your engine oil is frequently low between changes, it could indicate an oil leak or that your engine is burning oil. While topping it off temporarily is necessary, consult a mechanic to diagnose the underlying issue and prevent more serious engine damage.
How do I know what type of engine oil to add if it’s low?
Always refer to your vehicle’s owner’s manual to determine the exact type, viscosity (e.g., 5W-30), and specification of engine oil recommended for your specific engine. Using the wrong type can compromise lubrication, reduce engine efficiency, and potentially cause damage.
Is there a significant difference between checking engine oil on a completely cold vs. warm engine?
Yes, it’s generally recommended to check oil when the engine is warm but has been off for 5-10 minutes, allowing oil to settle back into the pan for an accurate reading. Checking a completely cold engine might show a slightly higher level due to all oil being settled, but a warm, settled reading is preferred for consistency and accuracy.