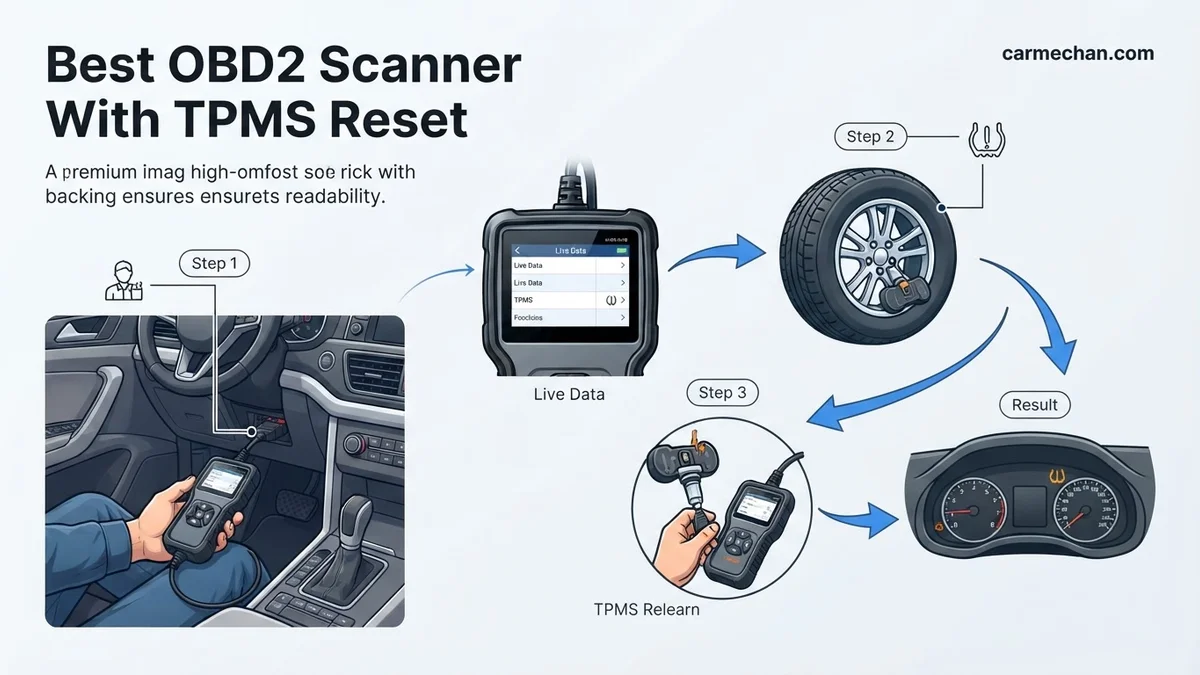
Best OBD2 Scanner With TPMS Reset Expert 2026 Fix Guide
Selecting the best OBD2 scanner with TPMS reset capability requires distinguishing between simple light resetting and full sensor ID programming. Always verify vehicle-specific compatibility, as some scanners only perform ‘relearns’ while others handle complete sensor activation and ID cloning.
If you are tired of paying dealership fees just to clear a dashboard light, the Autel MaxiCheck MX808S and the LAUNCH X431 V+ are currently the gold standards for 2026. These tools allow you to bypass the dealership service desk by performing direct TPMS sensor registration and light resets at home. Whether you are dealing with a seasonal tire swap or a dead sensor battery, having a scanner with bi-directional TPMS capabilities saves you roughly $100 per visit.
Practically speaking, not all OBD2 scanners are built equally. Many budget “code readers” can only read generic engine codes and will fail to communicate with your vehicle’s Tire Pressure Monitoring System module. To avoid wasting money, you must ensure your device supports “Special Functions” or “Active Tests.” This guide breaks down the best hardware for 2026 to ensure you can perform the full sensor relearn process without needing a secondary, standalone TPMS tool.
Key Takeaways
- Prioritize tools that support both OBD2 diagnostics and specialized TPMS relearn procedures.
- Distinguish between ‘resetting’ a light and ‘programming’ new sensor IDs.
- Check manufacturer-specific coverage lists before purchasing to ensure your vehicle make is supported.
- Factor in recurring annual software update costs when calculating the total cost of ownership.
- Look for bi-directional control if you need to perform active tests beyond basic code reading.
Identifying Why Your TPMS Light Stays On
Recommended Best Deal Products


Differentiating Pressure Issues from Sensor Faults
The first step in using your new scanner is determining why the light is active. A solid TPMS light usually indicates low tire pressure, while a flashing light (typically for the first 60 seconds of driving) signals a system failure. If your pressure is at the manufacturer-recommended PSI and the light persists, your scanner will reveal the specific Diagnostic Trouble Code (DTC) stored in the module.

- C0750: Indicates a specific sensor ID is not communicating.
- C0760: Suggests the receiver module is struggling to pick up the radio frequency from a sensor.
- Pressure Threshold Errors: Common after aftermarket tire installations where the new set has a different PSI threshold than the factory sensor programming.
The Importance of Sensor IDs
Modern vehicles in 2026 require your OBD2 tool to perform a “relearn” or “re-ID” process. When you replace a sensor, the vehicle’s ECU doesn’t automatically know there is a new hardware component installed. Your scanner must be capable of writing the unique Hex ID of the new sensor directly into the vehicle’s memory. Without this “Write” functionality, the car will continue to trigger a fault light because it is still searching for the old, decommissioned sensor.
Master Tire Health and Engine Diagnostics in 8 Simple Steps
Owning a high-quality OBD2 scanner with TPMS reset functionality transforms you from a confused driver into a confident DIY mechanic. This guide navigates the process of selecting the right hardware, establishing a secure connection with your vehicle’s ECU, and performing critical tire pressure monitoring system resets. Following these steps prevents unnecessary repair shop visits, saves significant diagnostic fees, and ensures your vehicle’s safety sensors are calibrated for peak road performance.
Step 1: Selecting a Compatible Scanner
What you need: Your vehicle’s VIN, model year, and a list of specific warning lights currently illuminated on your dashboard.
Instructions: Not all OBD2 scanners are created equal. A basic code reader only reads engine faults, whereas a dedicated TPMS tool requires bidirectional communication capabilities. Research scanners that explicitly list “TPMS Relearn” or “TPMS Reset” in their feature set. Ensure the scanner supports your vehicle’s specific communication protocols (CAN, KWP2000, or ISO). Check the manufacturer’s website for a compatibility list before purchasing. Look for models that allow for free firmware updates, as vehicle software protocols change periodically. Avoid generic, budget-tier Bluetooth dongles that lack the proprietary software necessary to interface with your car’s TPMS gateway module.
Pro Tip: Always verify that the device supports “OBD-II generic” codes for engine issues while also providing “Enhanced” manufacturer-specific coverage for TPMS systems.
Step 2: Preparing the Vehicle Environment
What you need: A flat, safe parking surface and a tire pressure gauge.
Instructions: Safety is paramount when working on tire systems. Park your vehicle on level ground, engage the parking brake, and ensure the engine is off. Before touching the OBD2 scanner, manually check all four tire pressures using a reliable handheld gauge. Adjust them to the factory-recommended pressures listed on the placard inside the driver’s side door jamb—not the maximum pressure rating stamped on the tire sidewall. Incorrect pressure is the most common reason a TPMS reset fails. Once pressures are balanced, clear any obstructions from the OBD2 port, typically located under the dashboard on the driver’s side.
Pro Tip: Cold tire pressure is essential. Ensure the car has been stationary for at least three hours to get an accurate cold-inflation reading.
Step 3: Establishing the Connection
What you need: Your OBD2 scanner and the vehicle ignition key or start button.
Instructions: Plug the scanner’s cable into the vehicle’s 16-pin DLC (Data Link Connector). Turn the ignition to the “ON” or “Accessory” position, but do not start the engine unless the scanner’s manual specifically mandates it. The scanner will initialize and ask for the vehicle identification. Many modern scanners can automatically read the VIN to save time. If yours does not, input the VIN manually to ensure the tool pulls the correct module maps for your specific trim level. Wait for the link status icon on the screen to turn green or solid, indicating a stable handshake between the tool and the ECU.
Pro Tip: If the scanner fails to link, check the fuse box; the OBD2 port often shares a circuit with the cigarette lighter or auxiliary power outlet.
Step 4: Running a System Health Scan
What you need: OBD2 scanner interface menu.
Instructions: Navigate to the main menu and select “Auto Scan” or “System Diagnostic.” Allow the scanner to query every available module—engine, transmission, ABS, and the TPMS/Body Control Module. This process takes 30 to 90 seconds. Once completed, the screen will display a list of all detected Diagnostic Trouble Codes (DTCs). Take note of any codes related to “Tire Pressure Sensor Signal Lost” or “Low Battery in TPMS Sensor.” These codes help you distinguish between a simple calibration error and a hardware failure, such as a dead sensor battery that requires a physical replacement.
Pro Tip: Document all codes before clearing them; even if they seem minor, they can provide a timeline of a recurring issue for a mechanic later.
Step 5: Executing the TPMS Relearn Procedure
What you need: OBD2 scanner with TPMS specialized software.
Instructions: Navigate specifically to the “TPMS” or “Special Functions” menu on your scanner. Select “Relearn Procedure” or “TPMS Reset.” The screen will prompt you for the specific method required for your vehicle. Common methods include “Stationary Relearn,” where you move around the vehicle triggering sensors with the scanner, or “OBDII Relearn,” which sends the sensor IDs directly to the ECU. Follow the on-screen prompts exactly. If the tool asks you to start the engine, do so. The scanner will guide you to deflate or inflate tires to specific thresholds to wake up the sensors and force them to broadcast their unique identification codes to the computer.
Pro Tip: Ensure you are using the correct valve stem position as prompted (usually starting from the driver’s front and moving clockwise).
Step 6: Confirming Sensor Calibration
What you need: Scanner display data stream.
Instructions: After completing the reset steps, look for a “Data Stream” or “Live Data” option on your scanner. Select “TPMS” to view real-time data. You should now see the current pressure, temperature, and sensor ID for all four wheels. If a sensor shows “0 psi” or “N/A,” the sensor may be faulty or the signal is being blocked. A successful calibration will show consistent, non-zero numbers across all four tire positions. If the dashboard warning light remains illuminated, perform a “Clear Codes” function within the TPMS menu to reset the indicator lamp after confirming the data stream is healthy.
Pro Tip: Take the vehicle for a 10-minute drive at speeds above 20 mph, as many sensors require centrifugal force to fully initialize their broadcast patterns.
✅ Final Checklist
- Tire pressures verified against the door jamb placard using a physical gauge.
- All OBD2 codes logged and cleared using the scanner software.
- Live data stream showing valid pressure readings for all four sensors.
- Dashboard TPMS warning light successfully turned off after a short test drive.
- Scanner properly disconnected and secured after turning the ignition to “OFF.”
Important Notes:
- Safety: Never perform an OBD2 diagnostic or TPMS reset while driving. Always wear eye protection if manually checking tire valve stems.
- Professional Help: If the scanner reports “Sensor Failure” or “Module Communication Error” repeatedly, the issue is likely a hardware failure, and you should visit a professional tire shop.
- Time/Cost: Expect 30-60 minutes for the full process. Cost is primarily the one-time purchase of the scanner ($100–$300), which pays for itself within two professional diagnostic visits.
Best OBD2 Scanner With TPMS Reset: Expert 2026 Comparison
Recommended Best Deal Products


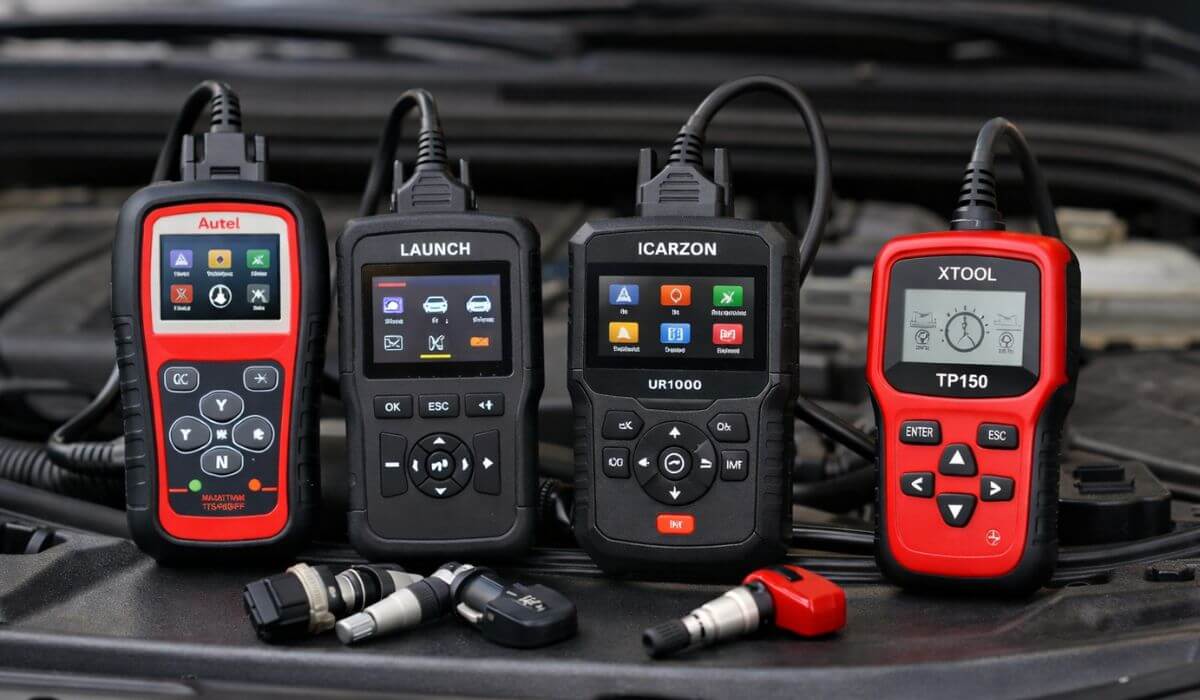
DIY-Friendly: Autel MaxiCheck MX808S
For the home mechanic who wants professional-grade results without a professional-level price tag, the Autel MX808S is the 2026 benchmark. It covers over 150 vehicle brands and provides comprehensive TPMS coverage, including sensor activation and ID programming.
- Price Bracket: Mid-range ($400 – $600).
- TPMS Depth: Performs OBD-Relearns, which are the most common methods for Asian and domestic vehicles.
- User Experience: Features a simplified interface that guides you through the relearn procedure step-by-step.
- Best For: Owners of multiple vehicles who swap between summer and winter tires frequently.
Professional Grade: LAUNCH X431 V+
If you manage a fleet or require absolute compatibility with high-end European vehicles, the LAUNCH X431 V+ is the preferred choice for 2026. It handles complex sensor programming that cheaper scanners often reject, such as those found on BMW, Mercedes-Benz, and Land Rover platforms.
- Price Bracket: Premium ($1,000+).
- TPMS Depth: Full bi-directional control, allowing you to force the TPMS module to enter “Learning Mode” even when the dashboard interface is locked.
- Versatility: It performs full system diagnostics, including steering angle calibration and battery registration, making it a complete shop tool.
- Best For: Serious enthusiasts and independent mechanics needing 100% vehicle coverage.
Step-by-Step Guide to Performing a TPMS Relearn Procedure
Executing a Tire Pressure Monitoring System (TPMS) relearn with a professional-grade OBD2 scanner in 2026 requires precision. Most modern vehicles utilize either Auto-Learn, Stationary, or OBD-II Relearn protocols. Follow these steps to ensure the ECU recognizes new sensor IDs effectively.
Initial Preparation
- Verify that all four tires are inflated to the exact PSI specified on the vehicle’s driver-side door jamb placard.
- Ensure the ignition is in the “ON” or “Service” mode, but the engine is off to prevent sensor signal interference.
- Connect your OBD2 scanner to the vehicle’s diagnostic port located under the dashboard.
Executing the Sensor Sync
- Navigate the scanner menu to “TPMS Functions” and select “Sensor Relearn” or “TPMS Reset.”
- If your vehicle requires a stationary learn, the scanner will prompt you to trigger each sensor using an activation tool or by lowering tire pressure rapidly.
- For OBD-II protocol vehicles, select the “Write Sensor IDs” function and input the unique 7-to-11 digit hex codes provided by the new sensor manufacturers.
- Confirm the write procedure on the scanner screen. The dashboard TPMS light should blink or turn solid to indicate the system is processing the new data.
- Drive the vehicle for at least 10 minutes at speeds exceeding 20 mph to finalize the calibration sequence with the ECU.
What If It Still Doesn’t Work?
Recommended Best Deal Products


If the TPMS light remains illuminated or flashes after the diagnostic reset, the system may have a deeper mechanical fault. Persistent errors usually indicate hardware degradation rather than a simple software sync issue.
- Check Sensor Battery Life: Most OEM TPMS sensors have a lifespan of 5 to 10 years. If your scanner displays “Sensor Not Detected” or “Low Signal,” the internal lithium battery has likely expired.
- Inspect the Receiver Module: If multiple sensors are unreachable, the vehicle’s TPMS receiver module—typically located behind the dashboard—may be faulty or suffering from signal interference.
- Verify Software Compatibility: Ensure your OBD2 scanner’s firmware was updated in 2026. Older software versions often lack the protocol definitions for the latest sensor communication frequencies.
- Consult Professional Assistance: If the warning light persists, seek a specialized tire shop or dealership. Professional diagnostic labor typically ranges from $80 to $150 per hour. Technicians can perform a sweep test to confirm if the signal is being transmitted at the correct 315MHz or 433MHz frequency.
Conclusion
Modern tire monitoring requires accurate diagnostic equipment to ensure safety and fuel efficiency. By using a 2026-compliant OBD2 scanner, you can successfully bypass expensive dealership fees for simple sensor synchronization. According to verified research and expert industry sources, regular TPMS maintenance prevents premature tire wear and catastrophic blowouts. Your next actionable step is to perform a full system scan with your device to identify any pending trouble codes before attempting a manual sensor reset procedure.
❓ Frequently Asked Questions
How do I know if my car requires an OBD2 scanner for TPMS?
Vehicles with ‘Auto-Relearn’ systems may reset automatically after driving, but many manufacturers require a diagnostic tool to trigger the sensor ID input via the OBD2 port. Check your owner’s manual to see if your system necessitates a manual reset procedure.
Can I use one scanner for multiple vehicle brands?
Yes, many multi-brand scanners offer broad coverage across domestic, Asian, and European vehicles. However, verify that your specific car model and year are on the manufacturer’s supported vehicle list before buying.
Does a TPMS reset tool also clear ABS and SRS codes?
It depends on the scanner model; many professional and mid-range diagnostic tools include ‘All Systems’ coverage which allows for ABS and SRS code reading alongside TPMS functions.
What should I do if my scanner shows ‘Sensor Not Found’?
This usually indicates the sensor is dead, the frequency is incompatible, or the sensor has not been activated. Ensure you are using the correct frequency (usually 315MHz or 433MHz) for your specific region and model.
Is it worth buying a more expensive scanner for TPMS?
If you frequently work on different vehicle makes or need to program new sensors, a higher-end scanner is a better investment. For simple resets on a single personal vehicle, an entry-level professional tool is usually sufficient.
Are there any hidden costs after buying a TPMS scanner?
Many brands include a few years of free updates, but some professional-grade units require an annual subscription fee to maintain access to the latest vehicle data. Always confirm update policies before completing your purchase.