2008 Honda Civic Relay Diagram: An Expert’S Guide To Electrical System Diagnostics
2008 Honda Civic Relay Diagram: An Expert’s Guide To Electrical System Diagnostics
Recommended Best Deal Products


📤 Share Image
The intricate electrical systems of modern vehicles, like your 2008 Honda Civic, rely heavily on small, yet critical components: relays. Diagnosing electrical issues can be a significant challenge for vehicle owners, often exacerbated by a lack of clear, professional guidance on interpreting relay diagrams and understanding their function. This expert guide will demystify the 2008 Honda Civic relay diagram, providing you with the authoritative knowledge and practical steps necessary to confidently locate, interpret, and troubleshoot common electrical faults, ensuring the reliable operation of your trusted vehicle.


Understanding Automotive Relays: Essential Components in Your 2008 Honda Civic
At its core, an automotive relay is an electromagnetic switch designed to allow a low-current circuit to control a high-current circuit. This fundamental capability is paramount in the 2008 Honda Civic’s intricate electrical architecture, enabling smaller, sensitive switches—like those on your dashboard—to activate components requiring substantial electrical power, such as headlights or the starter motor, without being subjected to damaging high amperage. Relays act as critical intermediaries, isolating high current paths from delicate control circuits, thereby protecting expensive switches from premature wear or failure.
A typical automotive relay consists of several key internal components: an electromagnetic coil, a set of electrical contacts, and an armature. When a low current flows through the coil (typically between pins 85 and 86), it generates a magnetic field. This field then pulls the armature, causing the contacts to close or open, thereby completing or interrupting the high-current path (often between pins 30 and 87, or 87a). This simple yet highly effective mechanism ensures efficient power distribution throughout the vehicle. For instance, a headlight relay protects the light switch from the significant amperage draw of the halogen bulbs, extending the switch’s operational life. Similarly, the fuel pump relay ensures the fuel pump only receives power when the engine is running or about to start, preventing continuous operation that could drain the battery or damage the pump. This careful control is vital for vehicle safety and longevity.
Automotive applications commonly utilize two primary types of relays: Normally Open (NO) and Normally Closed (NC). NO relays are the most common, where contacts are open when de-energized and close when the coil is activated. NC relays operate in reverse. Modern automotive relays are a testament to engineering quality, typically designed to withstand millions of switching cycles, often exceeding 100,000 cycles or 10 years of typical vehicle use before failure under normal operating conditions. This robust design underpins the reliable performance expected from your 2008 Honda Civic.

Locating Primary Relay Boxes in the 2008 Honda Civic
Recommended Best Deal Products


![[2G+64G] for Honda Civic 2006-2011 Wireless Carplay Android 15.0 Car Stereo |…](https://m.media-amazon.com/images/I/41uEvl6hnfL._SS500_.jpg)
To effectively diagnose electrical issues in your 2008 Honda Civic, the first step is to accurately locate the primary fuse and relay boxes. Honda, known for its pragmatic engineering, typically places these critical components in two strategic areas, designed for both accessibility and protection. Understanding these locations is a fundamental aspect of any comprehensive electrical diagnostics.
The primary relay hub is the under-hood fuse/relay box. In the 2008 Honda Civic, you’ll find this essential box situated on the driver’s side of the engine compartment, typically near the 12V battery. This box, often marked with a clear plastic lid secured by clips or tabs, houses relays responsible for major engine management systems, external lighting, and other high-current components crucial for vehicle operation. It controls vital functions such as the starter motor, cooling fans, main engine power, and anti-lock brake system (ABS). Accessing it usually involves unlatching a few clips and lifting the cover. A typical 2008 Honda Civic under-hood fuse/relay box contains approximately 12-18 standard relays alongside numerous fuses, each dedicated to a specific high-load component like the starter, cooling fans, or main engine power.
For cabin accessories and internal systems, your 2008 Civic utilizes an interior fuse/relay box. This box is commonly found in the passenger compartment, often hidden from plain sight. In many 2008 Civic models, it’s located behind a kick panel on the passenger side or discreetly beneath the dashboard, typically near the glove compartment. Look for a pull-off panel often labeled ‘FUSES’ or ‘RELAYS’ to gain access. While primarily a fuse box, it also houses several relays crucial for functions like power windows, door locks, the audio system, and accessory power outlets.
Always ensure the vehicle’s ignition is off and, for extended work, disconnect the negative battery terminal before attempting to access or manipulate any electrical components within these relay boxes. This prevents accidental shorts and potential injury.
Visually, relays within these boxes are typically square or rectangular blocks, often standardized in size for interchangeability. Their terminals fit snugly into specific slots. Familiarizing yourself with these locations and appearances is a professional step towards confident electrical troubleshooting, making you a trusted resource for your own vehicle’s maintenance needs.

Audible — Listen Free for 30 Days
One free credit a month and thousands of titles included.
Listen Free for 30 DaysInterpreting the 2008 Honda Civic Under-Hood Fuse and Relay Diagram
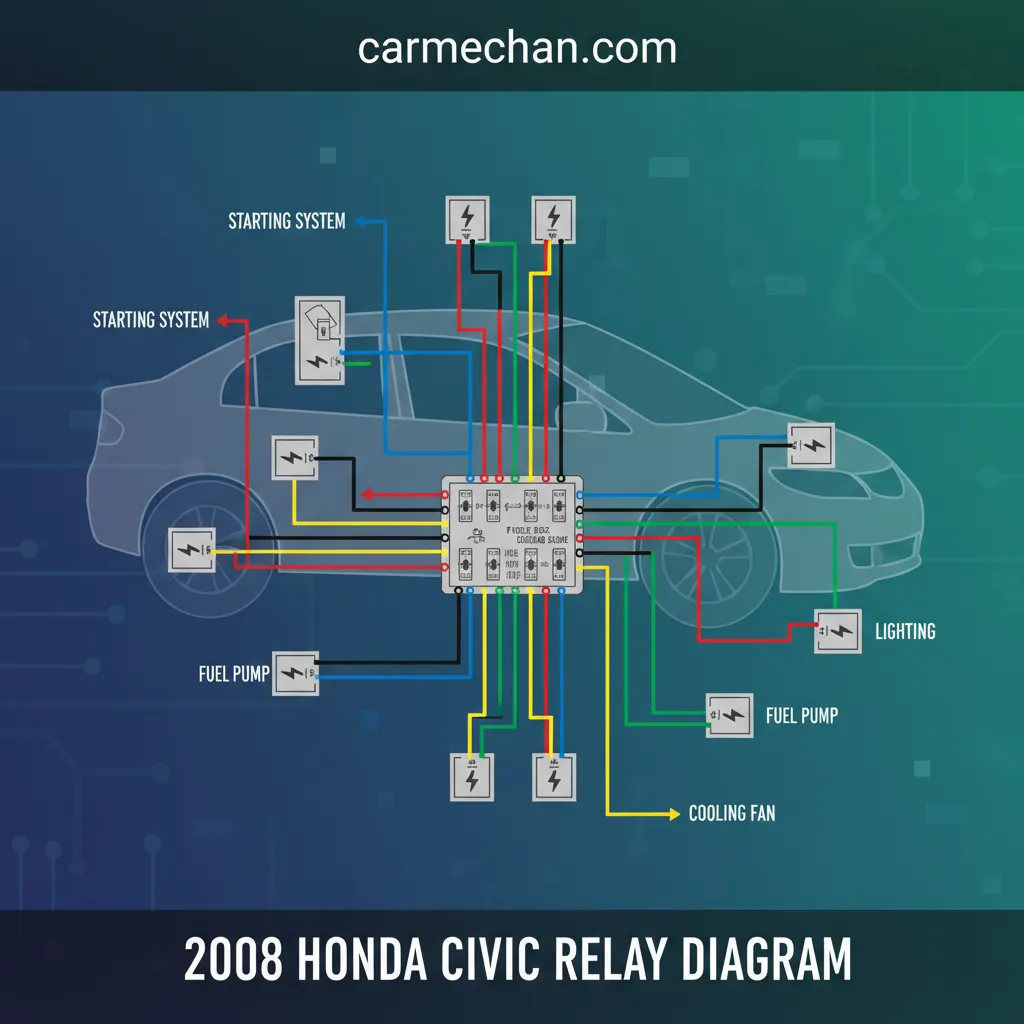
The under-hood fuse and relay diagram is your comprehensive map to the critical electrical functions of your 2008 Honda Civic. Without a clear understanding of this diagram, diagnosing issues can be a frustrating and inefficient process. This section provides an expert guide to effectively reading and utilizing this essential resource.
Most 2008 Honda Civic models will have a diagram printed on the inside of the under-hood fuse box lid, or a more detailed version available in the owner’s manual or a service manual. When interpreting the diagram, observe the orientation. Often, the diagram mirrors the physical layout of the relays and fuses within the box. Look for:
- Symbols and Legends: Each relay and fuse position will typically have a corresponding symbol or abbreviation. A legend, often at the bottom or side of the diagram, will decode these symbols (e.g., a headlight icon for the headlamp relay, “FAN” for a cooling fan relay, or “MAIN” for the main power relay).
- Numerical Designations: Fuses are usually denoted by their amperage (e.g., 10A, 20A), while relays might have generic labels like R1, R2, or more specific function names.
- Physical Layout Matching: Always compare the diagram to the actual layout in the fuse box. This ensures you’re identifying the correct component, preventing misdiagnosis.
Within the under-hood box, several high-current relays are critical for your Civic’s operation. Key relays to identify include:
- PGM-FI Main Relay (Main Relay): This is arguably one of the most important relays, often labeled ‘MAIN’ or ‘PGM-FI’ (Programmed Fuel Injection). It supplies power to the Engine Control Module (ECM) and various engine components. Locating this relay, often in position R1 or R2, is crucial for engine power diagnostics.
- Fuel Pump Relay: Vital for engine startup and operation, this relay energizes the fuel pump. If your vehicle cranks but won’t start, the fuel pump relay’s position on the diagram is a primary diagnostic point.
- Cooling Fan Relays: The 2008 Civic typically has one or two relays (often labeled ‘FAN’ or ‘RADIATOR FAN’) controlling the engine cooling fans, essential for preventing overheating.
- AC Clutch Relay: Controls the engagement of the air conditioning compressor clutch.
- Headlight Relays: Depending on the model, separate relays for high and low beams (e.g., ‘HL LO’, ‘HL HI’) might be present to manage the high current draw of the headlamps.
It’s imperative to understand the interrelationship between fuses and relays. A blown fuse often indicates an overcurrent condition, which could be caused by a faulty component the relay controls, or even a short within the relay itself. Conversely, a good fuse does not guarantee a functioning circuit if its corresponding relay has failed. For instance, if your vehicle cranks but won’t start, after confirming battery health, the fuel pump relay and its associated fuse are immediate points of investigation according to the diagram. Key relays like the main relay or fuel pump relay in the 2008 Honda Civic typically handle currents ranging from 20A to 40A, necessitating robust construction and precise diagram identification for proper system function. Referencing a quality, complete diagram is paramount for accurate troubleshooting.
Always start your under-hood diagnostics with the diagram. If a component is not working, identify its relay and its associated fuse first. Often, simply swapping a suspected relay with an identical, known-good relay from a non-critical circuit (e.g., horn relay) can quickly confirm or rule out a relay failure, saving significant diagnostic time.
Decoding the 2008 Honda Civic Interior Fuse and Relay Diagram
Recommended Best Deal Products


While the under-hood relay box manages the heavy-duty components, the interior fuse and relay box in your 2008 Honda Civic is the nerve center for your cabin’s comfort, convenience, and entertainment systems. Understanding its layout and the functions of its relays is crucial for diagnosing issues related to your vehicle’s internal electronics. This is a complete guide to navigating this often-overlooked electrical hub.
As previously noted, the interior fuse/relay box is typically located behind an access panel on the passenger side, often below or adjacent to the glove compartment. To access it, you will likely need to gently pry off a plastic trim panel. Once exposed, the diagram for this box may be printed on the back of the panel, inside the lid of the fuse box itself, or, for a more detailed and professional view, in your vehicle’s owner’s manual or a dedicated service manual. Always consult the vehicle-specific manual to ensure you have the most accurate and reliable information, especially given potential variations between trim levels.
Relays in the interior box typically manage circuits with lower amperage requirements compared to their under-hood counterparts, yet their functionality is equally vital for daily driving enjoyment. Common interior relays in the 2008 Honda Civic include:
- Power Window Relays: If your power windows are inoperative, consult the diagram for the ‘POWER WINDOW’ relay. Depending on the design, this might be a single relay controlling multiple windows, or individual relays for each window motor.
- Door Lock Relays: Controls the central locking system. If your remote or interior door lock switch fails to operate, this relay is a prime suspect.
- Audio System Relays: Often associated with the accessory power circuit, a persistent issue with the radio or infotainment system might point to the accessory relay.
- Sunroof Relay: For models equipped with a sunroof, a dedicated relay ensures its proper operation.
- Accessory Power Outlet Relays: If your 12V power outlets are not functioning, a relay (or fuse) dedicated to ‘ACC’ or ‘POWER OUTLET’ could be at fault.
When diagnosing a specific symptom, the process remains consistent: match the non-functional component to its corresponding relay on the diagram. Before testing the relay, always check the associated fuse first. A blown fuse is a simpler, more common fault and can often be a symptom of a larger underlying issue that also affects the relay. Interior relays generally operate at the vehicle’s standard 12V DC and manage lower amperage circuits, typically ranging from 5A to 20A for components like power windows, door locks, and audio systems, ensuring safe operation of cabin electronics. It’s an expert-level practice to note that while the core electrical system is similar, minor variations in relay configuration can exist between different trim levels (DX, LX, EX, Si) of the 2008 Honda Civic. For the most trusted and reliable information, always refer to your vehicle’s specific owner’s manual or a professional service guide.
Audible Premium Plus — Annual Membership
12 audiobook credits up front, plus the full Audible catalogue.
See Annual PlansDiagnosing Common 2008 Honda Civic Relay Failures and Troubleshooting
Despite their robust construction, relays are electro-mechanical components subject to wear and eventual failure. Recognizing the symptoms of a failing relay and employing effective diagnostic techniques are crucial skills for any 2008 Honda Civic owner seeking to maintain their vehicle’s optimal electrical performance. Approximately 15-20% of electrical component failures in vehicles over 10 years old can be attributed to relay malfunctions.
Typical Symptoms of a Failing Relay:
- Complete Component Failure: The most straightforward symptom. The controlled component (e.g., headlights, fuel pump) simply does not activate.
- Intermittent Operation: The component works sometimes but not others, or cuts out unexpectedly. This often suggests pitted or dirty relay contacts.
- Audible “Click” Without Activation: You hear the relay clicking when it should engage, but the component it controls does not turn on. This strongly indicates faulty internal contacts, while the coil itself might still be functional.
- Burnt Smell or Visible Damage: In severe cases of internal arcing or overheating, you might detect a burning smell or see visible discoloration/melting on the relay casing.
📋
Step-by-Step Guide: Testing a Relay
Before any electrical work, disconnect the negative battery terminal. Locate the suspected relay using your 2008 Honda Civic relay diagram and carefully pull it straight out from its socket. For example, if your 2008 Civic’s headlights intermittently fail, the headlamp relay should be tested.
Set your multimeter to ohms (Ω). Place the probes across the coil terminals (typically pins 85 and 86). You should get a reading, usually between 60 to 120 ohms for most automotive relays. An open circuit (OL or infinity) means the coil is faulty. A ‘clicking’ sound without power delivery often suggests faulty contacts, not necessarily the coil.
Using jumper wires, apply 12V DC power to the coil terminals (85 and 86) from your battery (ensure correct polarity). You should hear a distinct click. While power is applied, set your multimeter to continuity or low ohms. Test across the switch contacts (typically pins 30 and 87 for a Normally Open relay). You should get a reading close to zero ohms (indicating continuity). If not, the contacts are faulty.
For a quicker, though less diagnostic, approach, find an identical relay in your Civic that controls a non-critical component (e.g., the horn relay, if compatible). Swap the suspected faulty relay with the known good one. If the component now works, the original relay was indeed bad. If not, the issue lies elsewhere in the circuit (fuse, wiring, component itself).
When selecting a replacement relay, always prioritize matching Original Equipment Manufacturer (OEM) specifications. While aftermarket options exist, OEM or high-quality equivalents ensure compatibility with your 2008 Honda Civic’s electrical system, providing reliable performance and longevity. Install the new relay firmly into its designated socket, reconnect the battery, and test the component. By following these expert steps, you can confidently diagnose and resolve common relay-related electrical problems, contributing to the complete maintenance of your vehicle.
Conclusion
Understanding the 2008 Honda Civic’s relay diagram is essential for effective electrical system diagnostics and repair. Locating both the under-hood and interior fuse/relay boxes, and knowing how to interpret their respective diagrams, empowers precise troubleshooting. Recognizing common relay failure symptoms and utilizing proper testing methods can lead to accurate identification and resolution of electrical issues, fostering a more reliable and trusted vehicle.
Empower yourself with this expert knowledge to maintain the reliability of your 2008 Honda Civic. For complex electrical diagnostics or if unsure, always consult a trusted, certified automotive technician who possesses a comprehensive understanding of these intricate systems.
Frequently Asked Questions
Where is the main relay box located in a 2008 Honda Civic?
The 2008 Honda Civic features two primary relay boxes. The main under-hood fuse/relay box is typically located near the battery on the driver’s side of the engine compartment. An interior fuse/relay box, often containing relays for cabin accessories, is usually situated behind a kick panel on the passenger side or beneath the dashboard, requiring panel removal for access.
How do I test a relay in my 2008 Honda Civic?
To test a relay, you’ll need a multimeter and a 12V power source. First, check the coil resistance (pins 85 and 86) for an expected reading (e.g., 60-120 ohms). Then, apply 12V to the coil; you should hear a ‘click’ as the contacts close. With power applied, check for continuity across the switch contacts (pins 30 and 87). No click or no continuity indicates a faulty relay.
What are common symptoms of a faulty fuel pump relay in a 2008 Civic?
A faulty fuel pump relay in a 2008 Honda Civic typically manifests as a no-start condition or intermittent engine stalling. You might not hear the fuel pump prime when turning the ignition to the ‘ON’ position. Other symptoms include reduced engine performance, hesitation, or the engine cranking but failing to ignite due to insufficient fuel pressure delivery.
Can I use any 12V relay as a replacement in my 2008 Civic?
No, it’s crucial to use a replacement relay with the exact specifications as the original. While most automotive relays are 12V, they differ in amperage ratings, pin configurations (e.g., 4-pin, 5-pin), and internal resistance. Using an incorrect relay can lead to improper circuit operation, component damage, or even fire hazards due to inadequate current handling capacity. Always match part numbers.
What is the purpose of the main relay in a 2008 Honda Civic?
The main relay (often labeled PGM-FI main relay) in a 2008 Honda Civic is critical for engine operation. It supplies power to the Engine Control Module (ECM), fuel pump, and fuel injectors. When the ignition is turned on, the main relay engages, providing power to these vital components. A failure in this relay will prevent the engine from starting or cause it to stall unexpectedly.