How To Jump A Car With Cables Jump A Car With Cables 2026
Last Updated on September 1, 2026 by Ryan
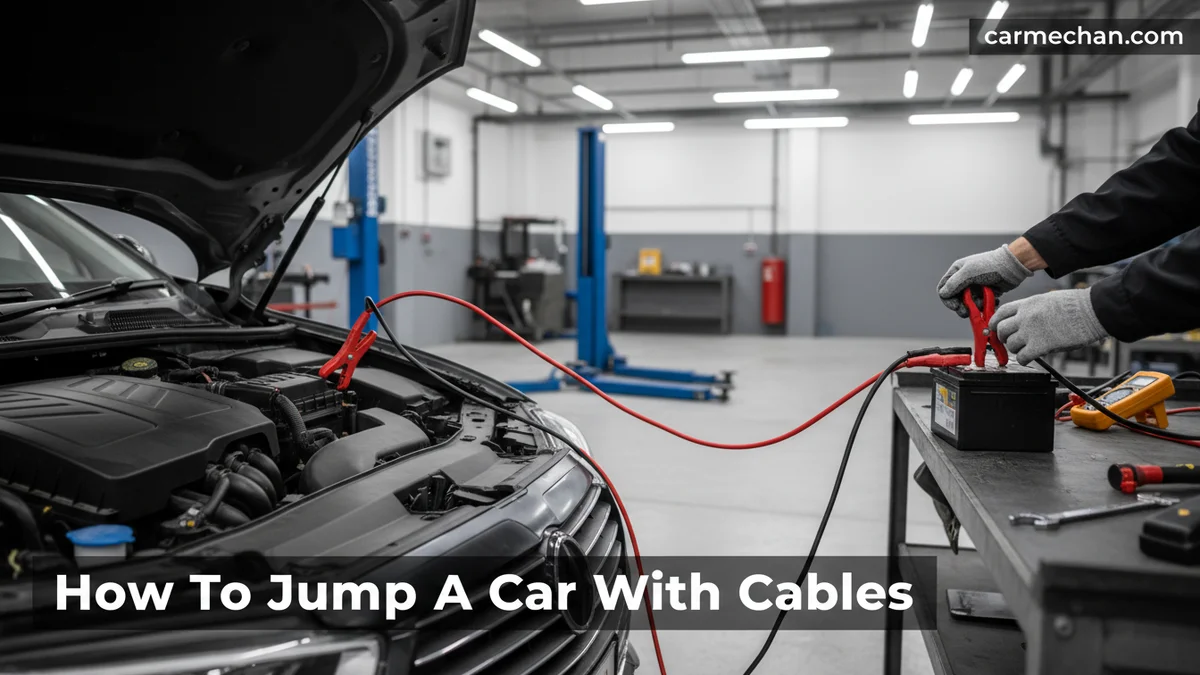
To jump start a car with cables, you must first ensure safety by gathering proper equipment and positioning vehicles correctly. Then, connect the red cable to the positive terminals of both batteries, and the black cable to the negative terminal of the donor car and an unpainted metal ground on the dead car, before starting the donor vehicle.
When your car battery dies, knowing how to jump a car with cables correctly is an essential skill for any driver, offering a quick fix to get you back on the road. A dead battery can strike at the most inconvenient times, leaving you stranded and stressed.
Our comprehensive guide for 2026 walks you through the entire process, ensuring you can confidently jump start a dead car safely and effectively.
This skill not only provides immediate relief but also empowers you to assist others in need. We understand the urgency and potential panic when faced with a non-starting vehicle. Our instructions focus on clarity and precision to guide you through each step. Before we begin connecting anything, we must cover the critical safety precautions to protect both you and your vehicles.
Key Takeaways


- Prioritize safety; wear eye protection and gloves.
- Always connect positive (red) to positive first.
- Ground the negative (black) cable away from the dead battery.
- Allow the donor car to charge the dead battery.
- Get your battery and charging system professionally tested.
7 Crucial Safety Steps Before Jumping Your Car


Before you even touch a jumper cable, follow these seven crucial safety steps to prevent injury or damage. Skipping these important preparations could lead to electrical shocks, battery explosions, or harm to vehicle electronics.

Gather Your Gear
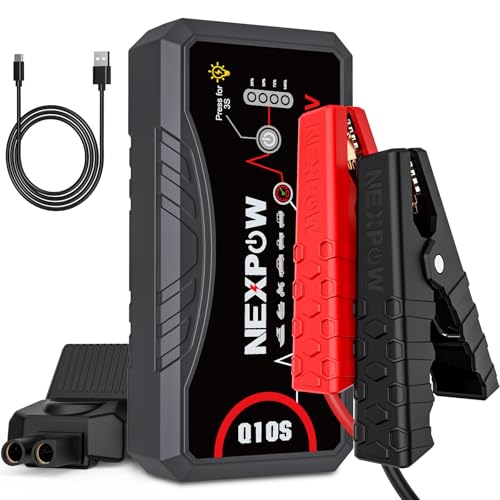
Ensure you have quality jumper cables. We recommend 4-gauge or 6-gauge cables for standard vehicles, as thinner cables may not carry enough current. Always keep a pair in your trunk for emergencies.
Position Vehicles Correctly
Park the donor car (with the charged battery) as close as possible to the disabled car, nose-to-nose or side-by-side, without touching. Turn off both engines and engage their parking brakes. This minimizes cable reach and enhances safety.
Check Car Batteries
Inspect both car batteries for cracks, leaks, or corrosion. Do not attempt to jump a battery that is visibly damaged, frozen, or leaking fluid, as this could cause an explosion. Ensure terminals are clean and accessible.
Wear Protective Gear
Always wear safety glasses or goggles and gloves. Battery acid is corrosive, and sparks can occur. This simple precaution can prevent severe eye injuries or skin burns.
Ensure Good Ventilation
Batteries can release hydrogen gas, which is highly flammable. Work in a well-ventilated area, avoiding enclosed spaces like a garage with the door closed. Open the hoods fully to allow air circulation.
Turn Off Electronics
Switch off headlights, radios, air conditioning, and any other accessories in both vehicles. This prevents electrical surges that could damage sensitive components during the jump start process.
Review Car Manual
Consult your vehicle’s owner’s manual for specific jump-starting instructions, especially for hybrid cars. Some modern vehicles have specific jump start terminals that are not directly on the battery itself. Your manual offers tailored advice.
With safety now firmly established, we can move on to the precise order of connecting your jumper cables.
How to Connect Jumper Cables in 5 Steps


Connecting jumper cables in the correct sequence is paramount; follow these five steps meticulously. An improper connection can lead to sparks, damage, or even battery explosions, so precision is key.
Identify Battery Terminals
Locate the positive (+) and negative (-) terminals on both car batteries. The positive terminal is usually larger and marked with a plus sign, often covered with a red cap. The negative terminal is marked with a minus sign, typically covered by a black cap or left exposed.
Attach Red to Dead
Connect one red (positive) clamp to the positive (+) terminal of the dead battery. Ensure the clamp has a firm, metal-to-metal grip. This is the first cable connection.
Connect Red to Donor
Take the other red (positive) clamp and connect it to the positive (+) terminal of the donor car’s battery. Double-check that both red clamps are securely attached to their respective positive terminals.
Ground Black Cable Safely
Connect one black (negative) clamp to the negative (-) terminal of the donor car’s battery. Then, connect the remaining black clamp to an unpainted metal surface on the engine block or chassis of the dead car. This grounding point should be away from the battery and moving parts.
This step helps prevent sparks near the battery, where flammable hydrogen gas might accumulate.
Start Donor Engine
Once all four clamps are securely attached, start the engine of the donor car. Let it run for a few minutes, ideally at a slightly elevated idle, to begin charging the dead battery. This preliminary charge is crucial for a successful jump start attempt.
Once your cables are securely connected, the next phase involves starting the dead car and then safely removing the cables.
How to Jump Start and Disconnect Safely
With your cables attached, carefully follow these steps to jump start your vehicle and safely disconnect. The disconnection process is just as critical as the connection to avoid electrical issues.

Attempt Start Dead Car
After the donor car has run for a few minutes, try to start the dead car. If it doesn’t start immediately, do not crank the engine for more than 10 seconds. Repeated cranking can overheat the starter motor. Give it a minute or two before trying again.
Wait for Battery Charge
If the dead car starts, let both vehicles run with the cables still connected for about This charging time helps the dead battery regain enough power to hold a charge on its own once the cables are removed.
Disconnect Cables Correctly
Disconnect the cables in the reverse order of connection to prevent sparks. First, remove the black clamp from the unpainted metal surface on the dead car. Next, remove the black clamp from the negative (-) terminal of the donor car. Then, remove the red clamp from the positive (+) terminal of the donor car.
Finally, remove the red clamp from the positive (+) terminal of the now-started car.
Secure Cables Away
Once all cables are disconnected, keep them separated and clear of any moving engine parts. Close both vehicle hoods. Ensure the cables are neatly stored in their case, ready for future use or storage. This prevents damage to the cables or other components.
Congratulations on successfully jumping your car! However, your journey is not quite over; there are vital steps to take immediately after a successful jump start.
What to Do Immediately After a Successful Jump Start?
After a successful jump start, specific actions can help ensure your car’s battery fully recharges and identify underlying issues. These steps are crucial to prevent a repeat of the dead battery scenario.
Drive Car Briefly
Drive your car for at least 20-30 minutes, or even longer, immediately after a jump start. This allows your alternator to properly recharge the battery. Avoid turning off the engine during this period. Short trips might not provide enough time for a full recharge.
Get Battery Tested
Even if your car starts, a dead battery often indicates an underlying issue. Visit a local auto parts store or mechanic to get your battery and charging system tested. They can determine if your battery is still good or if it needs replacement. The average lifespan of a car battery is
Monitor Battery Health
Pay attention to any signs of a failing battery in the coming days. Slow cranking, dimming lights, or a dashboard battery warning light are all indicators. Early detection can prevent you from getting stranded again. Consider a battery tender if your car sits for long periods.
Despite following all steps, sometimes a car refuses to cooperate after a jump start; let’s explore common reasons why your efforts might not have worked.
5 Common Reasons Your Jump Start Failed
If your car still won’t start after carefully attempting a jump start, one of these five common issues might be the cause. Understanding these problems can help you diagnose and resolve the issue.
Cables Are Loose
Loose or corroded cable connections are a frequent culprit. Even a slight wiggle can disrupt the electrical flow. Double-check that all four clamps are firmly attached to clean, metal surfaces. Sometimes cleaning the battery terminals can help improve conductivity.
Battery Too Dead
A battery that is completely drained or severely damaged may not accept a charge from a jump start. If the battery is old or has been dead for a long time, it might be beyond revival by simple jumper cables. A battery charger may be needed, or outright replacement.
Faulty Car Battery
The battery itself might be internally shorted or have a dead cell. In this case, even a strong donor car cannot provide enough power to start your vehicle. This often requires a new car battery. Signs of a failing battery include swelling or leaks.
Alternator Issues Exist
If your car starts but then dies shortly after disconnecting the cables, the alternator might be failing. The alternator is responsible for charging the battery while the engine runs. A faulty alternator won’t keep the battery charged.
Bad Starter Motor
The issue might not be the battery at all. A failing starter motor will prevent your car from turning over, even with a fully charged battery. You might hear a clicking sound or no sound at all when turning the key. This requires professional mechanical attention.
Understanding these potential issues can save you further frustration, and now we will address some frequently asked questions about jumping a car.
Frequently Asked Questions About Jump Starting
We’ve compiled answers to some of the most common questions regarding how to jump a car with cables, ensuring you have all the information you need.
What Happens If You Connect Jumper Cables Wrong?
Connecting jumper cables incorrectly can cause severe damage to your vehicle’s electrical system, including blowing fuses, damaging the alternator, or even causing the battery to explode. It also poses a serious risk of electrical shock or burns. Always follow the specified positive-to-positive and negative-to-ground sequence to ensure safety and prevent costly repairs.
How Long Should You Leave Jumper Cables on For?
After connecting the cables and starting the donor car, allow its engine to run for about 5 to 10 minutes. This duration gives the dead battery enough time to receive a minimal charge. After this initial charge, try starting the dead car. If it starts, you can then safely disconnect the cables in reverse order.
Can You Jump Start a Car With a Completely Dead Battery?
Yes, you can often jump start a car with a completely dead battery, but it might take longer for the donor car to provide enough initial charge. Ensure the donor car runs for an extended period, perhaps 10-15 minutes, before attempting to start the dead vehicle. A totally dead battery will still likely need professional assessment and possibly replacement.
Is It Safe to Jump Start a Modern Car?
Yes, it is generally safe to jump start most modern cars, but always consult the owner’s manual first, especially for hybrids or vehicles with complex electronics. Some manufacturers recommend specific jump points or procedures to protect sensitive systems. Following proper safety and connection steps minimizes risk to any vehicle.
What Size Jumper Cables Do I Need?
For standard passenger vehicles, a 6-gauge or 4-gauge jumper cable is typically recommended. Lower gauge numbers indicate thicker cables, which can carry more current and are better for larger engines or severely discharged batteries. Thicker cables also reduce resistance and heat buildup during the jump start process.
Mastering How to Jump a Car With Cables
Learning how to jump a car with cables is an invaluable skill, offering peace of mind and self-reliance on the road. By prioritizing safety, understanding the correct connection sequence, and knowing the post-jump actions, you can confidently handle a dead battery situation in 2026 and beyond.
Always keep a quality set of jumper cables in your vehicle’s emergency kit. This simple preparation can transform a stressful breakdown into a manageable inconvenience.
Remember that a successful jump start is often a temporary fix. It serves as a strong reminder to have your car’s battery and charging system regularly inspected. Proactive vehicle maintenance helps prevent future battery failures, keeping you and your vehicle moving reliably.