1997 Dodge Ram Van 2500 Fuse Diagram: Complete Guide
Last Updated on January 7, 2026 by Ryan

Did you know that the 1997 Dodge Ram Van 2500 belongs to one of the longest-running vehicle platforms in American history, with the B-Series design remaining fundamentally unchanged for over three decades? This longevity is a testament to its rugged construction, but as these workhorses age, their electrical systems often require attention. Most electrical failures in these vans are not catastrophic; they are simply the result of a blown fuse. Finding a reliable 1997 Dodge Ram Van 2500 fuse diagram is the most critical step for any owner looking to restore functionality to their headlights, radio, or power windows. This guide provides comprehensive information and essential details to help you master your van’s electrical layout, offering an overview of both fuse box locations and deep insights into what each circuit controls.
The electrical architecture of the 1997 Dodge Ram Van 2500 is a hybrid of traditional analog wiring and early computer-controlled systems. This specific model year is unique because it features the OBD-II diagnostic system, which means the fuses and relays are more critical than ever for proper engine communication. When searching for a 1997 Dodge Ram Van 2500 fuse diagram, it is important to understand that the system is split into low-voltage consumer circuits and high-voltage power distribution circuits. This guide acts as a summary of all known facts regarding the 1997 electrical layout, ensuring you have the insights needed to troubleshoot issues effectively. Whether you are dealing with a dead cigar lighter or a fuel pump that won’t prime, the following sections offer the facts you need to resolve the problem.
📋
Detailed Overview: Interior Fuse Panel
Recommended Best Deal Products


The interior fuse panel is your first stop for most common electrical inconveniences. It is located behind a removable cover on the end of the instrument panel, visible only when the driver’s side door is open. Here are the specific details and descriptions for the most critical circuits in this block:
The interior block uses standard “Blade” style fuses. If you find that your radio has stopped working or the cigar lighter isn’t charging your phone, Fuse #8 is the likely culprit. It is also worth noting that Fuse #18 is a frequent point of failure in older Dodge vans due to the high current draw of the blower motor as it ages. Understanding these specifics provides a quick summary of potential fix points without needing professional diagnostics.
The 1997 Dodge Ram Van 2500 uses a “Shared Circuit” for the cigar lighter and the radio. This means a faulty phone charger can blow the fuse and take your music with it. If your radio is dead, always check the cigar lighter for metallic debris that might be causing a short.
⚡
The Power Distribution Center (PDC)
While the interior panel handles the “soft” electronics, the Power Distribution Center (PDC) under the hood handles the “heavy lifting.” This box contains high-amperage Maxi-fuses and various relays that control the engine, transmission, and exterior lighting. It is located on the driver’s side fender well, near the battery. Accessing the 1997 Dodge Ram Van 2500 fuse diagram for the PDC is vital for solving “no-start” conditions.
ASD Relay
The Auto Shut Down (ASD) relay is the heart of the engine’s electrical system. If this fails, the van will crank but never start.

Audible — Listen Free for 30 Days
One free credit a month and thousands of titles included.
Listen Free for 30 DaysFuel Pump Relay
Controls power to the fuel pump. If you don’t hear a “hum” when turning the key, check this relay and its associated fuse.
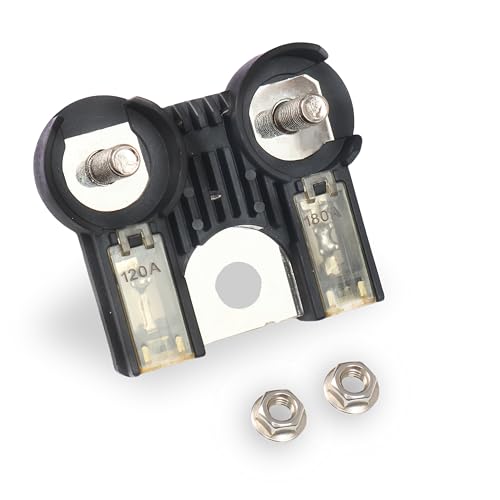
The PDC is also home to the charging system’s protection. A 120A or 140A “Alt” fuse (depending on your alternator’s output) protects the battery from overcharging. If this fuse blows, your van will run off the battery until it dies, even if the alternator is brand new. Having these insights and facts can save you from replacing an alternator when you only needed a five-dollar fuse.
📋
Step-by-Step Replacement Guide
Recommended Best Deal Products


Determine which component is failing. If it is an interior component like a light or radio, go to the dash panel. If it’s the engine or exterior lighting, start at the PDC.
Use a fuse puller (usually found in the PDC lid) to remove the suspected fuse. Hold it up to a light source; if the metal wire inside is broken or there is a dark scorch mark, the fuse is blown.
Never replace a fuse with one of a higher amperage rating. If the diagram calls for a 15A fuse, only use a 15A fuse. Replacing it with a 30A fuse to “prevent it from blowing” can cause a fire.
One of the most valuable insights for Dodge Ram Van 2500 owners is understanding the color-coding of these fuses. Automotive fuses are standardized by color: Blue is 15A, Yellow is 20A, Clear is 25A, and Green is 30A. This quick info makes it easy to spot a mismatch even without looking at the numbers stamped on top. This summary of fuse colors is an essential part of any DIY toolkit.
Always turn off the ignition and disconnect the negative battery cable before working on high-amperage fuses in the Power Distribution Center. This prevents accidental shorts that could damage the van’s Engine Control Module (ECM).
🔍
Deep Dive: Troubleshooting Common Electrical Gremlins
The 1997 Dodge Ram Van 2500 is known for a few specific electrical quirks. Providing detailed information on these issues can save you hours of searching. One common problem involves the instrument cluster suddenly losing power. While you might suspect a complex computer failure, it is often just a loose connection or a blown “IGN/GAU” fuse in the interior panel. Another frequent issue is the failure of the tail lights while the brake lights continue to work perfectly. This indicates that the fuse for the parking lamps is intact, but the multi-function switch on the steering column may be at fault, or there is a ground wire issue near the rear bumper.
Furthermore, the 1997 Dodge Ram Van 2500 is susceptible to corrosion in the PDC. Because it is located near the battery, acid fumes can occasionally lead to oxidized terminals. If your relays click but the device (like the starter or fuel pump) doesn’t engage, try removing the relay and cleaning the contacts with a bit of electronic cleaner. This is a vital piece of information that many guides overlook, yet it is a common fact for long-term Dodge owners. These insights ensure your troubleshooting is comprehensive and your results are permanent.
Audible Premium Plus — Annual Membership
12 audiobook credits up front, plus the full Audible catalogue.
See Annual Plans✨ Key Benefits of Carrying This Guide
Recommended Best Deal Products


Cost Savings
Avoid expensive diagnostic fees at the dealership by identifying simple fuse failures yourself.
Faster Repairs
With the diagram and locations at your fingertips, you can fix electrical issues in minutes, not hours.
The 1997 Dodge Ram Van 2500 remains a favorite for van-life conversions and heavy-duty work. Because these vans often carry extra electrical loads from aftermarket lights, heavy-duty chargers, or interior modifications, the electrical system is frequently pushed to its limit. Having a firm grasp of the fuse diagram isn’t just about repair; it’s about safe ownership. By understanding the limits of each circuit, you can prevent overloading your van’s vintage wiring. This summary provides the foundation you need to keep your 1997 Dodge Ram Van 2500 reliable for years to come. Whether you’re on a job site or a cross-country road trip, these facts and insights ensure that a single blown fuse never leaves you stranded.
Mastering your 1997 Dodge Ram Van 2500 fuse diagram is an essential skill for any owner. We have covered the critical interior panel for cabin comfort and the Power Distribution Center for engine reliability. By following the step-by-step guide and utilizing the pro tips provided, you can maintain your vehicle’s electrical health with confidence. Remember to always keep a small kit of spare fuses and a pair of needle-nose pliers in your van at all times. This proactive approach ensures that the “information” and “details” found here today translate into actual road-side readiness tomorrow. For more insights on maintaining your classic Dodge, continue to monitor your electrical connections and replace aging relays before they fail. Happy driving, and keep your electrical circuits flowing smoothly!
❓ Frequently Asked Questions
1
Where is the 1997 Dodge Ram Van 2500 fuse box?
Your 1997 Dodge Ram Van 2500 features two main fuse locations. The primary interior fuse panel is situated on the driver-side end of the dashboard, accessible when the door is open. The high-current Power Distribution Center (PDC) is located under the hood near the battery for major circuits.
2
How do I read the fuse diagram?
Reading the diagram requires matching the numbered slots on the physical fuse box to the corresponding list in the manual or on the lid. This info provides details on which specific circuit each fuse protects, such as the fuel pump, radio, or turn signals, ensuring accurate troubleshooting.
3
Why do fuses blow in a Dodge Ram Van?
Fuses are designed to fail when an electrical circuit experiences an overload or a short. Common facts suggest that aging wiring, faulty components, or moisture can trigger a blow. Identifying the underlying cause is essential to prevent the new fuse from failing immediately after it is replaced.
4
What are the common fuse amp ratings?
Amp ratings are indicated by the number printed on top of the fuse and its color. For example, blue typically represents 15 amps, while yellow is 20 amps. Referencing the definitive fuse diagram ensures you use the correct rating to protect your van’s electrical components from damage.
5
Can I replace a fuse myself?
Yes, replacing a fuse is a simple task that requires no professional mechanical skills. By using the provided insights and a fuse puller, you can swap out a damaged part in minutes. It is a cost-effective way to restore power to your dashboard, lights, or interior accessories.
Author

Similar Posts
How to Reset Lamp Out Light on Dodge Ram: Quick and Easy Steps
Last Updated on October 26, 2023 by Albert Duke To reset the lamp out light on a Dodge Ram, disconnect both battery terminals and touch them together for a few seconds to perform a hard reset of the modules. This will turn off the lamp out light. Offer Prime for Young Adults — 6 Months…
How to Reset Service Brake System Light Silverado: Step-by-Step Guide
Last Updated on May 5, 2026 by Albert Duke To reset the service brake system light on a Silverado, you can try cleaning the ground connection for the ABS computer located under the driver’s door. Remove the bolts that secure the wires to the frame and clean the connection. Offer Prime for Young Adults —…
Burning Smell When Heat Is On In Car Burning Smell 2026
Last Updated on September 1, 2026 by Albert Duke Quick Summary A burning smell from your car’s heater often signals issues ranging from harmless dust accumulation to serious fluid leaks or electrical problems. Prompt diagnosis is crucial to identify the source and determine whether it’s a minor annoyance or a safety hazard requiring immediate professional…
Ford Fusion Cruise Control Not Working: Diagnosed & Fixed
Is your Ford Fusion failing to hold a steady speed, leaving you with foot fatigue on long drives? A non-functioning cruise control isn’t just an annoyance; it is often the dashboard’s way of signaling a deeper electronic fault within the car’s safety network. In this guide, we will break down exactly why your Ford Fusion…
Reset Maintenance Light Toyota Push Start: Quick and Easy Guide
Last Updated on October 23, 2023 by Albert Duke To reset the maintenance light on a Toyota push start, turn off the vehicle, locate the reset button, and press it. Then, press the start button to the on position. Offer Prime for Young Adults — 6 Months Free Students and 18–24s get six months of…
Can I Drive My Car With The Check Engine Light On 2026
Last Updated on July 29, 2026 by Albert Duke 📌 Quick Summary can i drive my car with the check engine light on is an essential topic with practical applications and significant benefits. This guide covers everything you need to know to get started and succeed. Offer Audible — Listen Free for 30 Days One…