How Do 360 Cameras Work? The Tech Behind Spherical Views
Last Updated on September 1, 2026 by Ryan
360 cameras primarily work by using multiple fisheye lenses that capture overlapping fields of view. These separate images or video streams are then stitched together algorithmically, either in-camera or during post-production, to form a single, seamless spherical image or video file ready for immersive viewing.

Prime for Young Adults — 6 Months Free
Students and 18–24s get six months of Prime free, then half price.
Start 6 Months Free🎯 Key Takeaways
Recommended Best Deal Products


- Multiple fisheye lenses capture overlapping views.
- Software stitches images for seamless spherical output.
- Overlap is crucial for accurate image alignment.
- Distortion correction is part of the stitching process.
- Final output uses equirectangular projection format.
360 cameras capture a complete spherical field of view by employing a meticulously engineered combination of multiple ultra-wide-angle lenses and advanced image-stitching software. This sophisticated interplay allows these devices to record everything around them simultaneously, transforming disparate individual images into a single, immersive panoramic experience. Understanding this technical process reveals why these cameras are so revolutionary for virtual reality, immersive content, and unique perspectives.
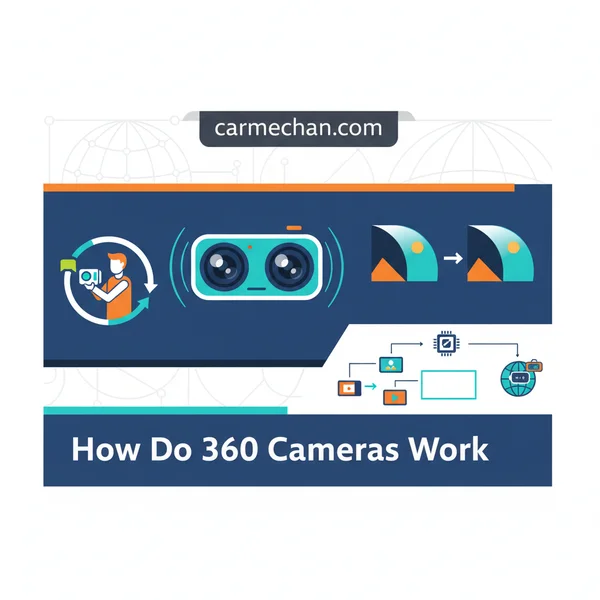
The practical implication of this technology is profound. You’re no longer limited to a narrow viewpoint; instead, you get a full, encompassing digital world. This enables experiences like “teleporting” viewers to different locations or providing interactive content where you, the viewer, control the direction. It’s the core reason 360 content feels so different and engaging compared to traditional video.
Understanding the Multi-Lens Optical System
The foundation of any 360 camera lies in its optical hardware: a specialized array of lenses designed to capture more than a full hemisphere each. Most consumer 360 cameras achieve their spherical view using a surprisingly simple yet effective setup: two fisheye lenses mounted back-to-back, pointing in opposite directions. This dual-lens configuration is optimized for efficiency and compactness.
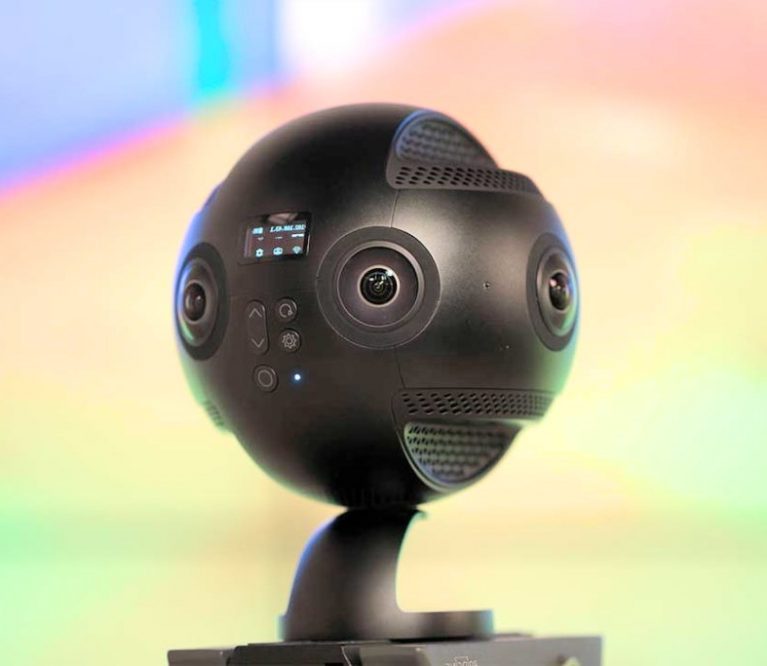
The Core Design: Two Fisheye Lenses
Fisheye lenses are crucial here because they offer an extremely wide field of view (FoV), typically far exceeding 180 degrees. A common setup involves two lenses, each capturing approximately 210 to 220 degrees. This extra wide capture angle is not accidental; it’s fundamental to the stitching process. Each lens acts independently, recording its own hemisphere, but also a significant portion of the opposite hemisphere. This means that if you draw a line directly through the center of the camera, each lens sees well past that line into the other lens’s territory.
- Extreme Wide-Angle: Fisheye lenses use complex optical elements to bend light severely, compressing a vast scene into a circular or highly distorted rectangular image frame.
- Dual Configuration: Two lenses are positioned precisely 180 degrees apart to cover the entire horizontal plane and vertical axis.
- Distortion is Intentional: The characteristic barrel distortion of fisheye lenses isn’t a flaw; it’s a feature that allows them to capture such a wide FoV. This distortion is later corrected by software.
The Critical Role of Overlap
The key to seamless 360 capture isn’t just that the lenses cover a full sphere, but that they deliberately over-cover it. The significant overlap area, where both lenses capture the same visual information, is the secret sauce for successful image stitching. Without sufficient overlap, the stitching software would struggle to find common reference points, leading to visible seams and gaps in the final spherical image.
Imagine two overlapping circles. The region where they intersect is where the software does its most critical work. This overlap zone typically ranges from 30 to 60 degrees, depending on the camera’s design and lens specifics. Within this area, the software identifies identical features, such as edges, textures, and color gradients, from both lens feeds. These common points become anchors for aligning and blending the separate images.
- No Gaps: Overlap ensures that no part of the 360-degree environment is missed between the individual lens captures.
- Reference Points: The shared visual information provides the necessary data for algorithms to precisely align and blend the images.
- Minimizing Parallax: While perfect parallax isn’t possible with two lenses, software uses the overlap to intelligently mask stitching errors, especially for distant objects. Close-up objects remain the primary challenge due to varying perspectives from each lens.
While two lenses are the most common configuration for consumer 360 cameras due to their balance of size, cost, and performance, some professional or specialized cameras may use three or more lenses. This approach provides even greater resolution, reduces stitching artifacts, and can improve dynamic range by distributing the field of view among more sensors, but it adds complexity and cost.
The Ultimate 360 Camera Walkthrough
Recommended Best Deal Products


Welcome to this comprehensive guide designed to demystify the fascinating technology behind 360 cameras. Whether you’re a curious enthusiast, an aspiring VR content creator, or simply wondering how those immersive videos are made, understanding the inner workings of a 360 camera is crucial. This step-by-step walkthrough will break down the complex processes, from lens design to final immersive playback, equipping you with the knowledge to appreciate and even troubleshoot these remarkable devices. By following these steps, you’ll gain a professional-level understanding of how these cameras capture and stitch together a complete spherical view of the world around them.

Audible — Listen Free for 30 Days
One free credit a month and thousands of titles included.
Listen Free for 30 DaysStep 1: The Multi-Lens Array – Capturing Every Angle
What you need: A physical 360 camera (e.g., Insta360 X3, GoPro Max, Ricoh Theta Z1) and an understanding of basic optical principles.
Instructions: At its core, a 360 camera isn’t just one lens; it typically employs two or more ultra-wide-angle (fisheye) lenses, strategically placed to capture overlapping fields of view. The most common setup involves two fisheye lenses mounted back-to-back, each designed to capture a hemispherical (nearly 180-degree) scene. Some professional rigs use six or more lenses arranged spherically. These lenses are engineered to maximize their field of view, often exceeding 180 degrees diagonally, ensuring that there are no blind spots or gaps when their outputs are combined later in the process.
Pro Tip: The quality of the fisheye lenses is paramount. Higher-quality lenses reduce chromatic aberration and barrel distortion, which significantly improves the final stitched image quality and reduces visible seams.
Step 2: Synchronized Image Acquisition – Freezing the Moment
What you need: The camera’s internal image sensors (CMOS or CCD) and a robust internal processor.
Instructions: Each lens in the array is paired with its own dedicated image sensor, usually a CMOS sensor, which converts incoming light into digital data. For a seamless 360 experience, all these sensors must capture their respective frames at the exact same instant. This critical synchronization is managed by the camera’s internal processor, ensuring that every pixel from every lens corresponds to the same moment in time. Without precise synchronization, moving objects in the scene would appear to “ghost” or be misaligned across the stitching lines, breaking the immersion and revealing the underlying multi-camera setup. This synchronized capture is crucial for both still photos and, especially, video.
Pro Tip: Look for cameras with advanced synchronization capabilities, especially if you plan to shoot fast-moving action. Cheaper models might struggle to maintain perfect sync, leading to noticeable “ghosting” artifacts in dynamic scenes.
Step 3: Pre-Stitching Distortion Correction – Preparing for a Seamless Blend
What you need: The camera’s firmware or dedicated desktop/mobile software.
Instructions: Before the individual images from each lens can be combined, they first undergo a process of geometric correction. Fisheye lenses inherently produce significant barrel distortion, where straight lines appear curved and objects at the edges of the frame are stretched. The camera’s processor (or external software) applies complex algorithms to “un-distort” each image, transforming them from their warped fisheye appearance into a more rectilinear projection. This step is crucial because accurate stitching requires that the overlapping regions from different lenses match up as precisely as possible, without the underlying distortions complicating the alignment process. This initial correction prepares the images for the true magic of stitching.
Pro Tip: Some cameras offer different levels of in-camera distortion correction. For critical projects, consider using post-production software which often provides more granular control and potentially higher quality correction algorithms.
Audible Premium Plus — Annual Membership
12 audiobook credits up front, plus the full Audible catalogue.
See Annual PlansStep 4: The Stitching Algorithm – Weaving Multiple Perspectives into One
What you need: Sophisticated stitching software (either embedded in the camera or as an external application).
Instructions: This is arguably the most complex and critical step. Once the individual images are distortion-corrected, the stitching algorithm identifies common features and patterns in the overlapping regions between adjacent lenses. It then computationally “warps” and blends these areas, precisely aligning them to create a single, continuous spherical image or video. Advanced algorithms use optical flow analysis for video to maintain consistent seams across frames, minimizing visible transition lines. This process combines the various hemispherical views into a unified 360-degree panorama, filling in the entire spherical space captured by the camera. The quality of this algorithm directly dictates how seamless and immersive the final content will be.
Pro Tip: For the best results, ensure your camera’s firmware is up to date, as manufacturers often release updates that improve stitching algorithms. For very challenging shots, consider manual stitching in specialized software like PTGui or Mistika VR for ultimate control.
Step 5: Equirectangular Projection – The Standard 360 Format
What you need: Understanding of spherical coordinates and image mapping.
Instructions: After the stitching process, the resulting spherical image or video is flattened into a standard format known as an equirectangular projection. Imagine peeling an orange and flattening its skin – that’s essentially what an equirectangular image is. It’s a rectangular image where the entire 360-degree horizontal field (0-360°) is mapped along the width, and the entire 180-degree vertical field (from zenith to nadir, or straight up to straight down) is mapped along the height. While it appears highly distorted and stretched on a flat screen (especially at the top and bottom), this format is the universally accepted standard for 360 content, ready for playback in any compatible viewer.
Pro Tip: When viewing an equirectangular image directly, objects near the top and bottom poles will appear extremely stretched. Don’t be alarmed; this distortion is designed to be corrected when viewed within a 360-degree player.
Step 6: Metadata Embedding – Signaling the Spherical Nature
What you need: The camera’s internal software or a dedicated metadata injection tool.
Instructions: For a standard image or video player to understand that a flat equirectangular file is actually 360-degree content, special metadata must be embedded within the file itself. This metadata, often in the form of XMP tags, contains crucial information such as the projection type (equirectangular), the field of view, and sometimes even the camera model. When a 360-compatible player (like YouTube, Facebook, or a VR headset app) opens the file, it reads this metadata. Without it, the player would simply display the equirectangular image as a regular, flat, and distorted video or photo, missing the immersive capabilities entirely. Most 360 cameras automatically embed this metadata during export.
Pro Tip: If your 360 content isn’t playing correctly on a platform, or it appears flat, the first thing to check is if the 360 metadata is properly embedded. Tools like the “Spatial Media Metadata Injector” can manually add or verify this metadata.
Step 7: Immersive Playback – Experiencing the Spherical World
What you need: A 360-compatible viewer (e.g., smartphone with gyroscope, desktop browser, VR headset).
Instructions: The final step is the viewing experience. When a 360-compatible player receives an equirectangular file with the correct metadata, it takes this flat image and computationally “wraps” it onto the inside of a virtual sphere. Your viewing device (e.g., a smartphone or VR headset) then uses its internal sensors (like gyroscopes and accelerometers) to track your head movements. As you physically turn your head or move your device, the player dynamically adjusts the visible portion of the virtual sphere, creating the illusion that you are looking around a real-world environment. This interactive mapping of your physical movements to the virtual camera view is what delivers the compelling and immersive 360 experience.
Pro Tip: For the most immersive experience, always view 360 content in a VR headset. While smartphones and desktop browsers offer interaction, VR headsets block out the external world, enhancing the sense of presence within the captured scene.
✅ Final Checklist
-
All fisheye lenses are clean and free of smudges or scratches, ensuring clear input.
-
Camera firmware is up to date, leveraging the latest stitching and synchronization improvements.
-
Content is correctly processed into a standard equirectangular projection.
-
360-degree metadata is properly embedded in the final file for platform recognition.
-
Viewing platform supports 360 content and correctly interprets user movement for interaction.
Important Notes:
- Safety Considerations: When filming, be aware of your surroundings, as the camera captures everything. Avoid placing the camera in hazardous locations or directly facing the sun for extended periods, which can damage sensors.
- When to Seek Professional Help: If your camera consistently produces severe stitching errors, exhibits hardware malfunctions (e.g., lens focus issues, sensor degradation), or fails to synchronize properly despite troubleshooting, it may be time to contact the manufacturer’s support or a professional repair service.
- Estimated Time and Cost Range: Understanding how 360 cameras work takes minimal time (this guide is about 15-20 minutes to read). The cost of a 360 camera itself can range from approximately $200 for entry-level models to $5,000+ for professional VR cameras, with consumer-grade options typically falling between $300-$800.
The Science of Image Stitching and Software Processing
Once the multiple lenses capture their overlapping fields of view, the raw data isn’t yet a spherical image. That’s where sophisticated stitching software comes into play, acting as the brain of the 360 camera system. This software takes the distorted, separate images and digitally merges them into one cohesive, seamless panorama.

Real-time vs. Post-production Stitching
The stitching process can happen in one of two ways, offering different trade-offs in speed and quality:
- In-Camera (Real-time) Stitching: Many consumer 360 cameras feature powerful internal processors that can stitch photos and even video as you shoot it. This offers immediate results, allowing for quick sharing or live streaming directly from the camera. The convenience is unmatched, but the processing power limits the complexity of algorithms used, sometimes leading to slightly less refined results than post-production.
- Post-production Stitching: For higher quality, greater flexibility, and more control, footage is often transferred to a computer for processing using dedicated desktop software. This allows for more powerful algorithms, manual adjustments to stitch lines, color correction, and stabilization. Professional workflows almost exclusively rely on post-production stitching to achieve the best possible output.
The Algorithmic Magic
Regardless of whether it’s real-time or post-production, the core principles of stitching remain the same. The software employs advanced algorithms to perform several critical steps:
- Geometric Correction: The first step is to “de-fisheye” the images. The software mathematically reverses the barrel distortion introduced by the fisheye lenses, transforming them into flat, rectilinear projections.
- Feature Matching: Using the overlapping areas, the algorithms identify thousands of common points and features across the adjacent images. This is where the precise alignment happens.
- Transformation and Blending: Once aligned, the software calculates the necessary rotation, scaling, and perspective adjustments for each image. It then carefully blends the pixels in the overlap zones to create a smooth transition, effectively hiding the seams where the images join. This often involves feathering, gradient blending, and color/exposure matching to ensure uniformity.
- Output Projection: The final stitched output is typically an equirectangular projection. This is a rectangular image format that maps the spherical view onto a flat plane, similar to how a world map represents the globe. This equirectangular image is then ready for viewing in 360 players or VR headsets, which re-project it back into a sphere.
From Raw Data to Immersive Spherical Projection
Once the multiple lenses have meticulously captured their respective fields of view, the real digital heavy lifting begins. The camera’s internal processor, or dedicated stitching software on a computer, takes over. This is where the magic of transforming disparate images into a single, seamless 360-degree experience truly unfolds.
Stitching Algorithms: The Digital Seamstress
The individual images captured by each lens are distinct, yet strategically overlapping. Sophisticated stitching algorithms are the brains behind precisely aligning these images, identifying common features in the overlapping regions. They meticulously adjust for subtle differences in exposure, white balance, and perspective across the various lens feeds.
- Feature Matching: Algorithms identify unique points, lines, and textures that appear in multiple images to establish alignment.
- Parallax Correction: A significant challenge is parallax – the apparent shift of objects when viewed from different positions. Advanced algorithms work to minimize these discrepancies, especially with closer subjects, preventing “ghosting” or misalignments.
- Seamless Blending: After alignment, algorithms blend the edges of the images to create invisible seams. This often involves feathering, color correction, and exposure matching to ensure a smooth transition across the entire panorama.
- Real-time vs. Post-production: Some cameras can stitch in real-time, offering instant previews, while others require more powerful post-processing on a computer for the highest quality results.
Think of it like an expert tailor meticulously matching patterns and colors between fabric pieces to create a single, flowing garment – but done instantly and automatically by powerful software.
Projection Mapping: Crafting the Sphere
After the individual images are stitched together into a cohesive panoramic strip, this flat, two-dimensional image needs to be “mapped” onto a spherical surface. This transformation is crucial for creating the immersive, all-encompassing viewing experience unique to 360 content.
The industry standard for representing 360-degree content is equirectangular projection. This format unwraps a sphere onto a 2D rectangular image, much like a world map projects the globe. When viewed in a compatible 360 player, this equirectangular image is then re-wrapped onto a virtual sphere, allowing you to “look around.”
- Equirectangular Format: This universal format allows 360 content to be shared across various platforms (YouTube, Facebook, VR headsets).
- Distortion Management: Due to the nature of projecting a sphere onto a flat plane, equirectangular images will appear stretched and distorted, particularly at the top and bottom (the poles). This distortion is inherent and corrects itself when the image is viewed within a 360 player.
- Metadata Embedding: Crucially, metadata is embedded within the final file to signal to viewing platforms and software that it is 360-degree content, instructing them on how to properly display it.
Without this final projection step, your perfectly stitched panorama would just be a very wide flat image, lacking the interactive, spherical magic.
Key Innovations Driving 360 Camera Performance
The journey from bulky, multi-camera rigs to sleek, pocket-sized devices has been propelled by continuous technological advancements. Modern 360 cameras are packed with features that enhance user experience and image quality, making spherical capture more accessible and impressive than ever before.
Enhanced Image Stabilization
Shaky footage is a notorious culprit for ruining any video, but it’s amplified exponentially in 360 content, as viewers can look in any direction and notice every wobble and jolt. Therefore, advanced image stabilization has become paramount for producing watchable 360 videos.
- Electronic Image Stabilization (EIS): Most modern 360 cameras rely on sophisticated EIS algorithms, leveraging internal gyroscopes and accelerometers. These sensors detect even the slightest camera movements.
- Digital Correction: The EIS system digitally shifts and warps individual frames to counteract detected motion, smoothing out bumps, shakes, and vibrations.
- Gimbal-like Smoothness: Technologies like GoPro’s HyperSmooth or Insta360’s FlowState deliver incredibly stable footage, often rivaling the results from external mechanical gimbals, even during dynamic activities like mountain biking or skiing.
- “Level Horizon” Feature: Many systems also include an auto-leveling horizon, ensuring your footage always looks perfectly balanced, regardless of how the camera is tilted.
This “invisible” stabilization is a game-changer, allowing creators to capture fluid, immersive perspectives without being tethered to cumbersome external gear.
Computational Photography & AI
Beyond basic stitching and stabilization, computational photography techniques are revolutionizing image quality, creative possibilities, and ease of use in 360 cameras. Artificial intelligence (AI) is increasingly playing a pivotal role in these advancements.
- Smart Stitching Refinements: AI can further enhance stitching precision, intelligently identifying and correcting stitching errors, and reducing artifacts like lens flare or inconsistencies in lighting across lens boundaries.
- Invisible Selfie Stick: AI algorithms can analyze the captured footage and automatically “erase” the selfie stick or drone from the final 360 image, creating the illusion that the camera is floating independently.
- Dynamic Reframing: Some cameras use AI to help users easily “reframe” traditional flat videos from their 360 footage, automatically tracking subjects, highlighting interesting action, or suggesting cinematic camera movements.
- Image Enhancement: AI-powered features contribute to improved dynamic range, better low-light performance, and noise reduction, producing sharper, more vibrant 360 photos and videos.
- Future Potential: As AI develops, expect more sophisticated object recognition, real-time depth sensing, and even more automated creative options to emerge.
These smart features empower creators to achieve professional-looking results with minimal effort, pushing the boundaries of what’s possible with a compact 360 camera.
Conclusion
360 cameras are far more than just multiple lenses stuck together; they are sophisticated imaging powerhouses. From the precise alignment of their wide-angle optics to the complex stitching and projection algorithms that process the raw data, every component works in harmony to capture and present our world in an entirely new, immersive dimension. Understanding the underlying technology helps us appreciate the seamless spherical views we now effortlessly enjoy.
Ready to dive into spherical content creation?
- Experiment with different 360 camera models to discover how their unique features and stabilization technologies can elevate your creative output.
- Explore online 360 communities and tutorials for practical tips on shooting techniques, optimal lighting, and effective editing workflows.
The world is waiting to be captured from every angle – go out and create your own immersive stories!
❓ Frequently Asked Questions
What is the fundamental principle behind 360-degree capture?
The core principle involves capturing multiple overlapping wide-angle images simultaneously from different perspectives. These individual images are then algorithmically merged to create a single, continuous spherical view, simulating what it would look like if a camera could see in all directions at once.
How do fisheye lenses contribute to 360 camera functionality?
Fisheye lenses are critical because they offer an extremely wide field of view, often exceeding 180 degrees. This allows two opposing lenses to cover more than a full sphere, ensuring sufficient overlap between their captured images, which is essential for accurate and seamless stitching without gaps.
Explain the role of stitching software in creating a 360 image.
Stitching software is the brain behind the 360 output. It analyzes the overlapping areas from different lenses, corrects for lens distortion, aligns the images precisely, and blends them seamlessly at the seams. This process transforms multiple individual views into a single, cohesive, navigable spherical panorama or video.
Are there different types of 360 camera setups?
Yes, while most consumer 360 cameras use a dual-fisheye lens setup, professional rigs can employ four or more conventional lenses arranged in a circle, or even complex multi-camera arrays. The more lenses, generally the higher the resolution and less visible stitching errors, but also higher cost and complexity.
How does a 360 camera handle parallax errors?
Parallax errors occur when objects close to the camera appear to shift differently between lenses, making stitching difficult. While software attempts to correct this, it’s minimized by keeping subjects further away and by having camera designs with minimal distance between lens optical centers, known as the ‘no-parallax point.’
What happens to the captured 360 data after it’s recorded?
After recording, the stitched 360 image or video is typically saved in an equirectangular projection format, which maps the spherical view onto a flat rectangular image. This file can then be viewed on compatible platforms (e.g., YouTube, Facebook), VR headsets, or specialized viewers that allow users to pan and tilt within the immersive content.